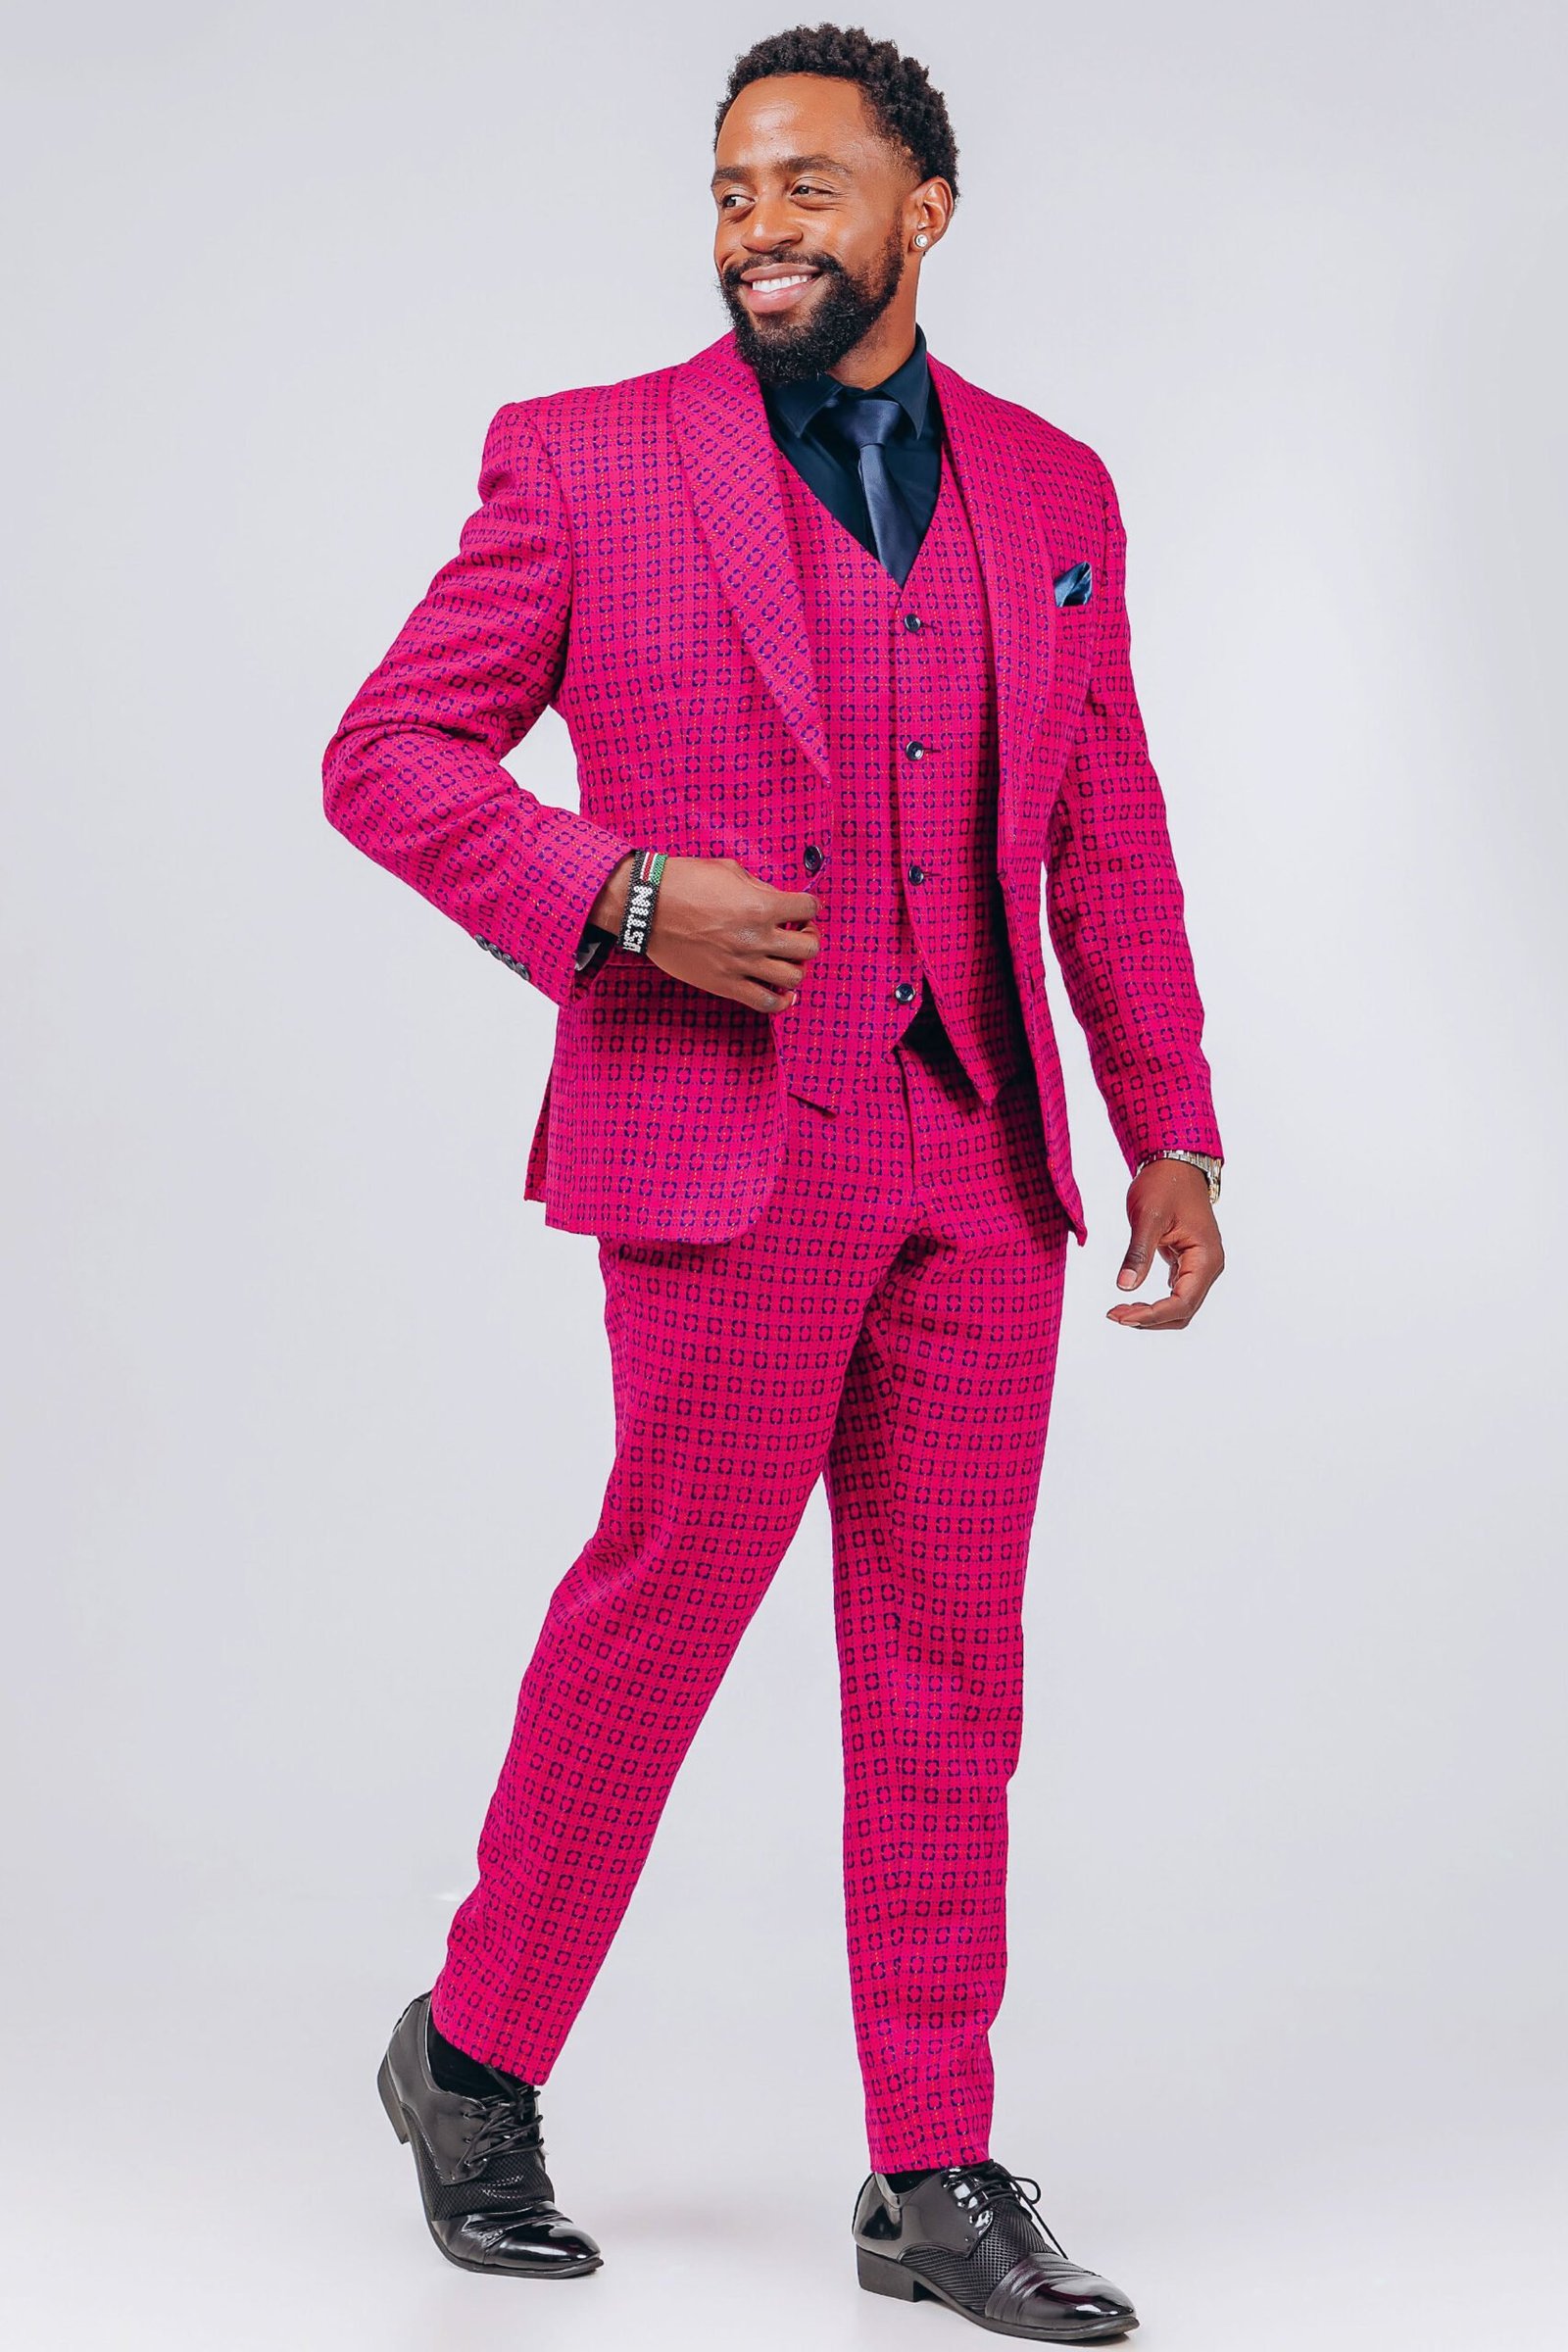
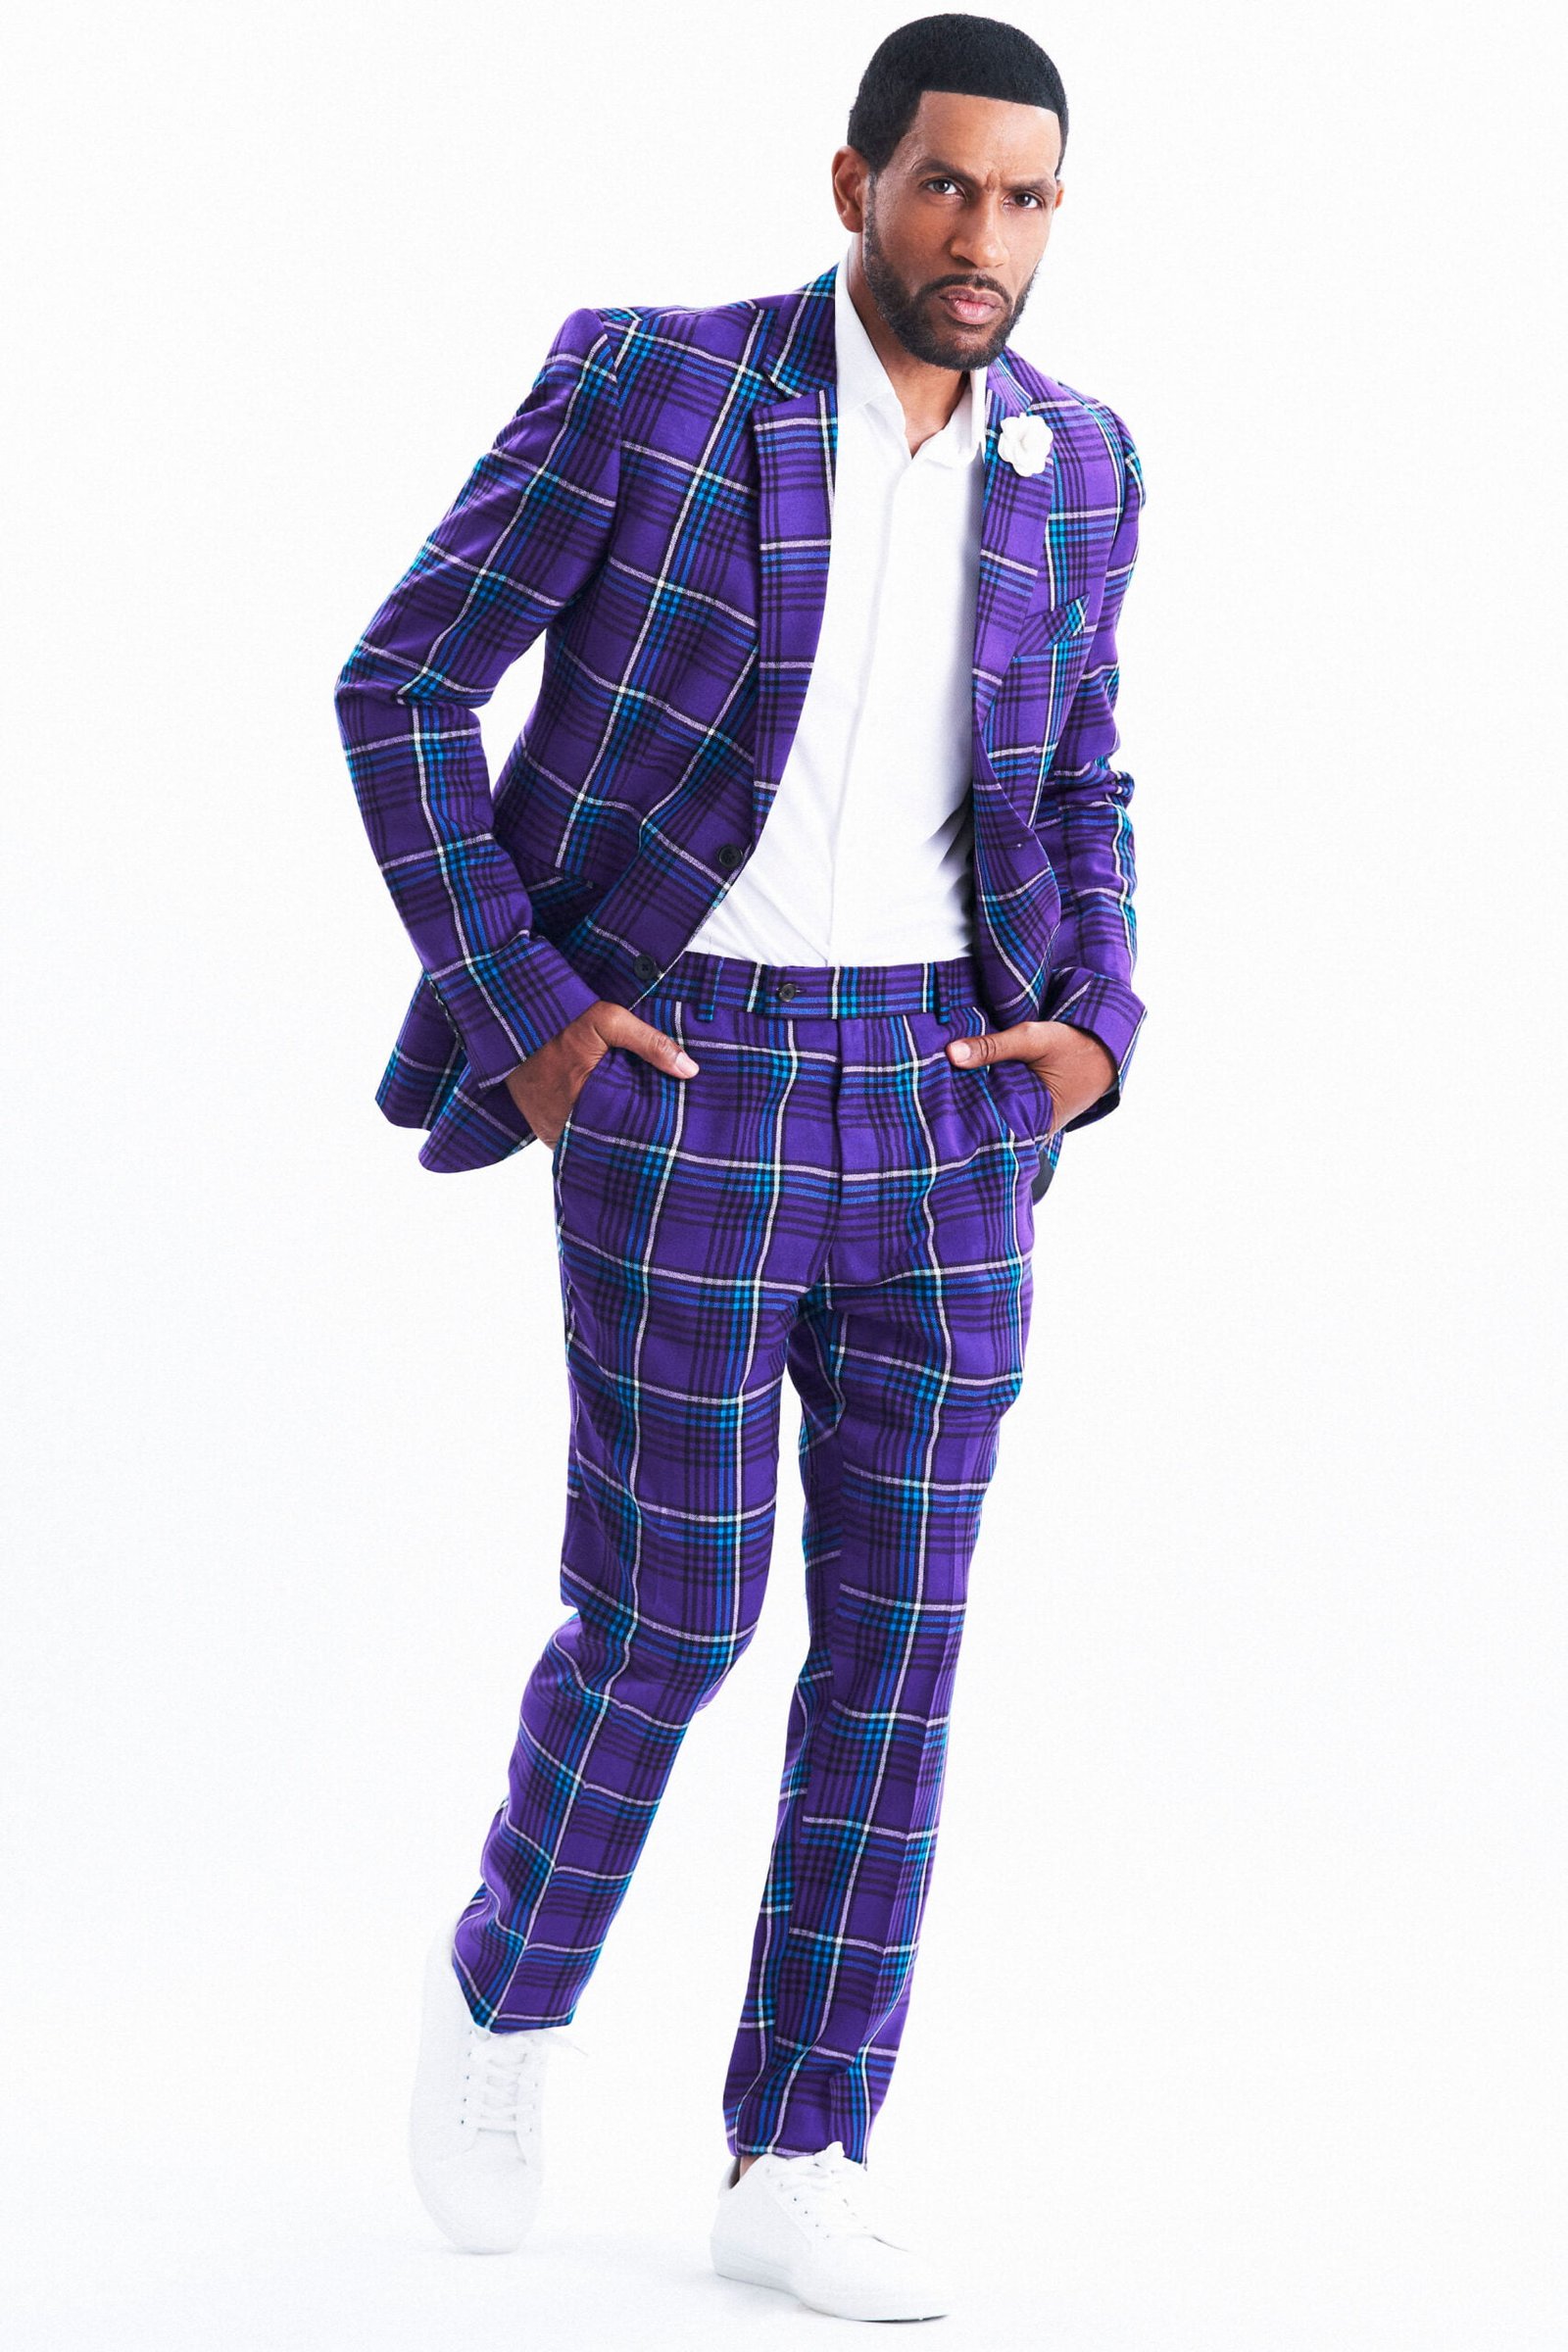
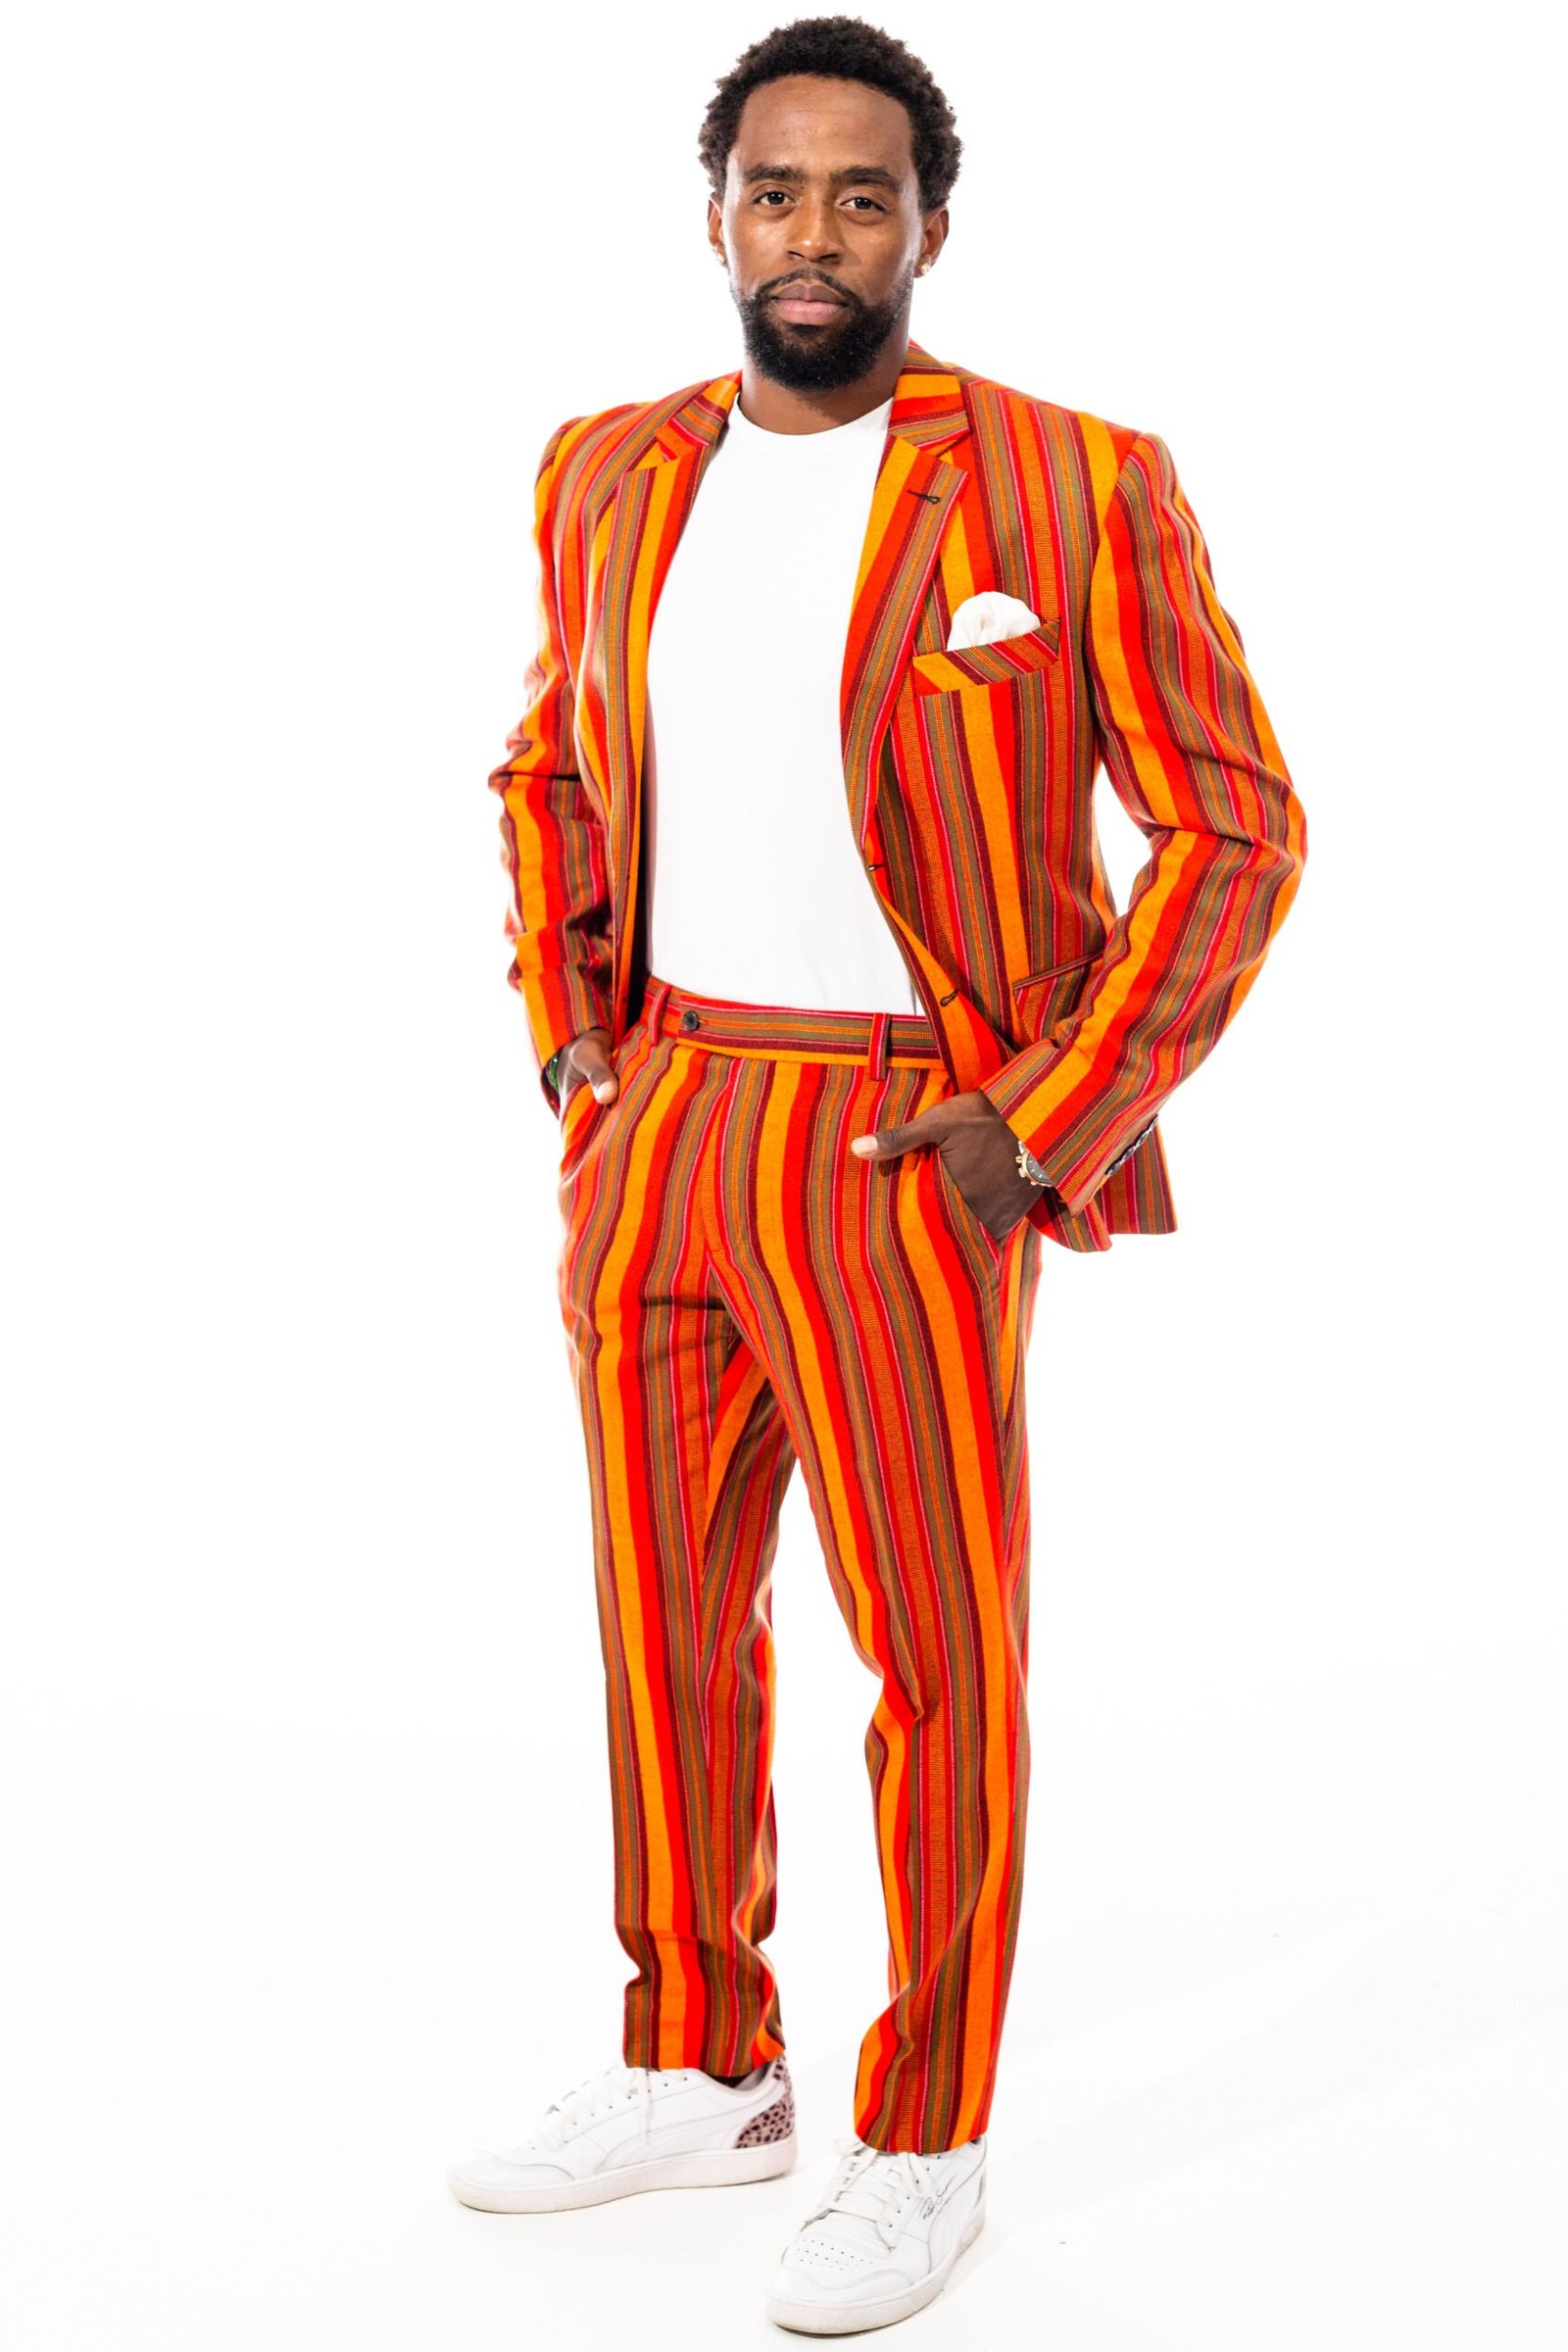
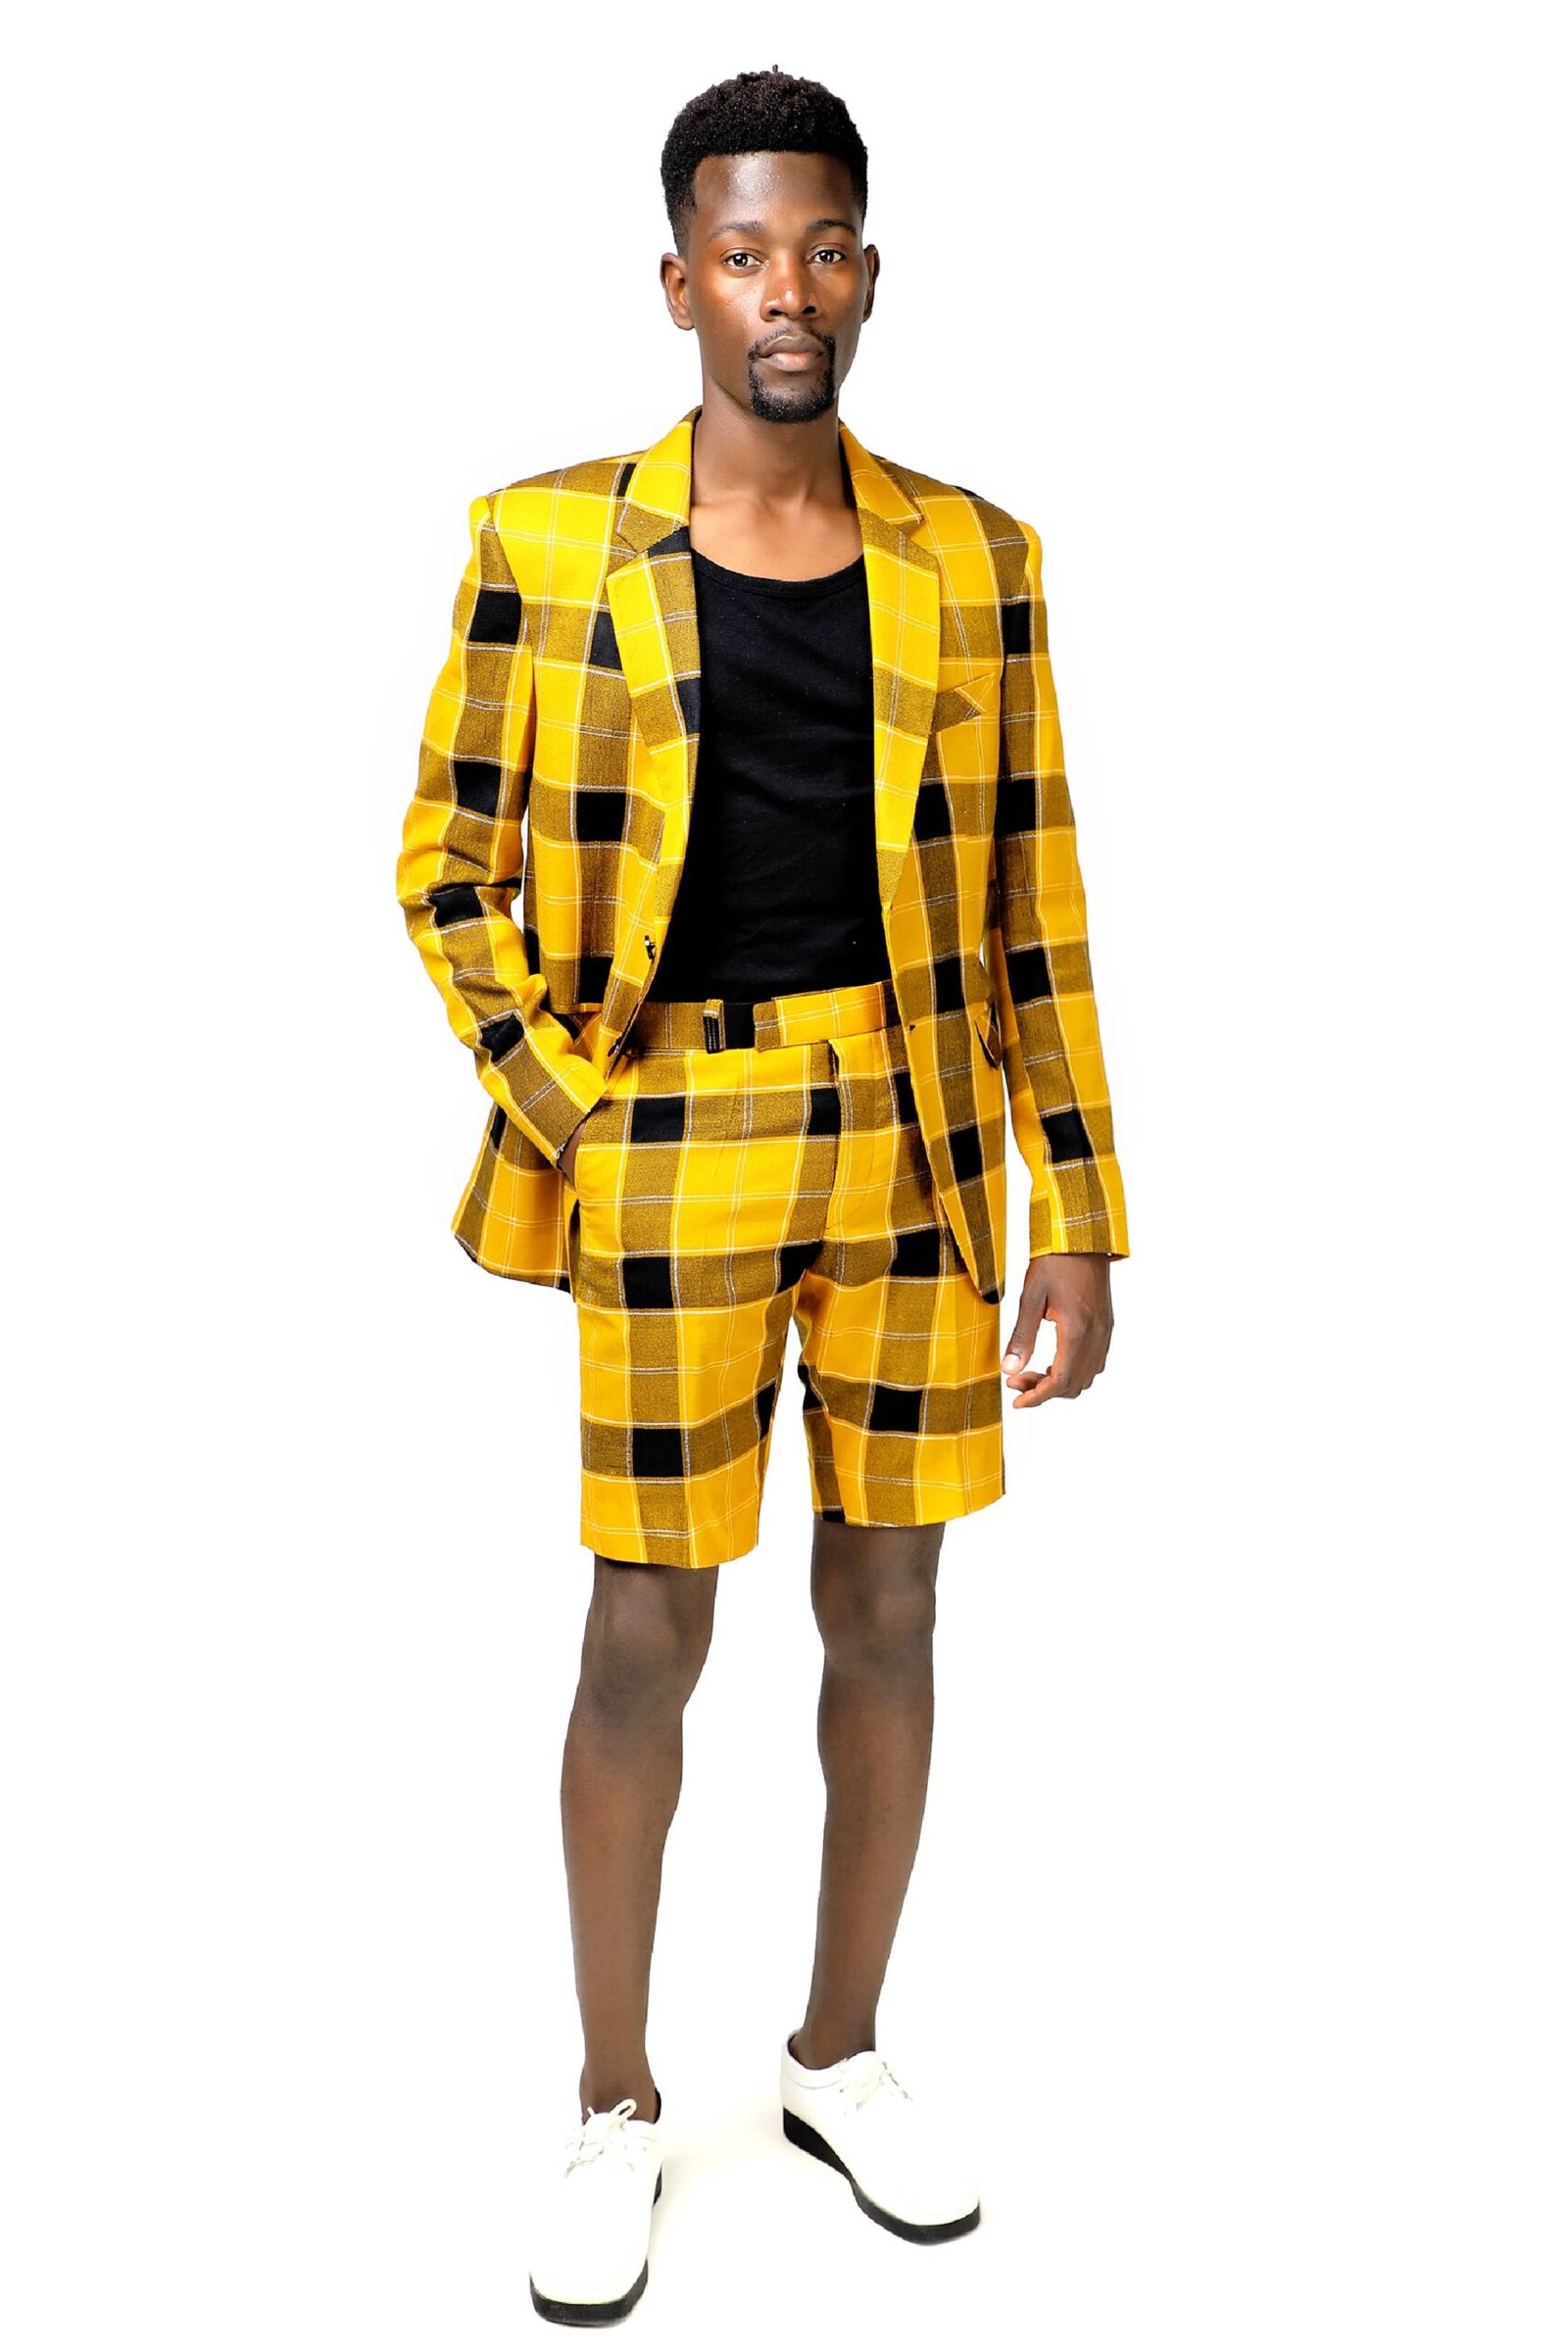
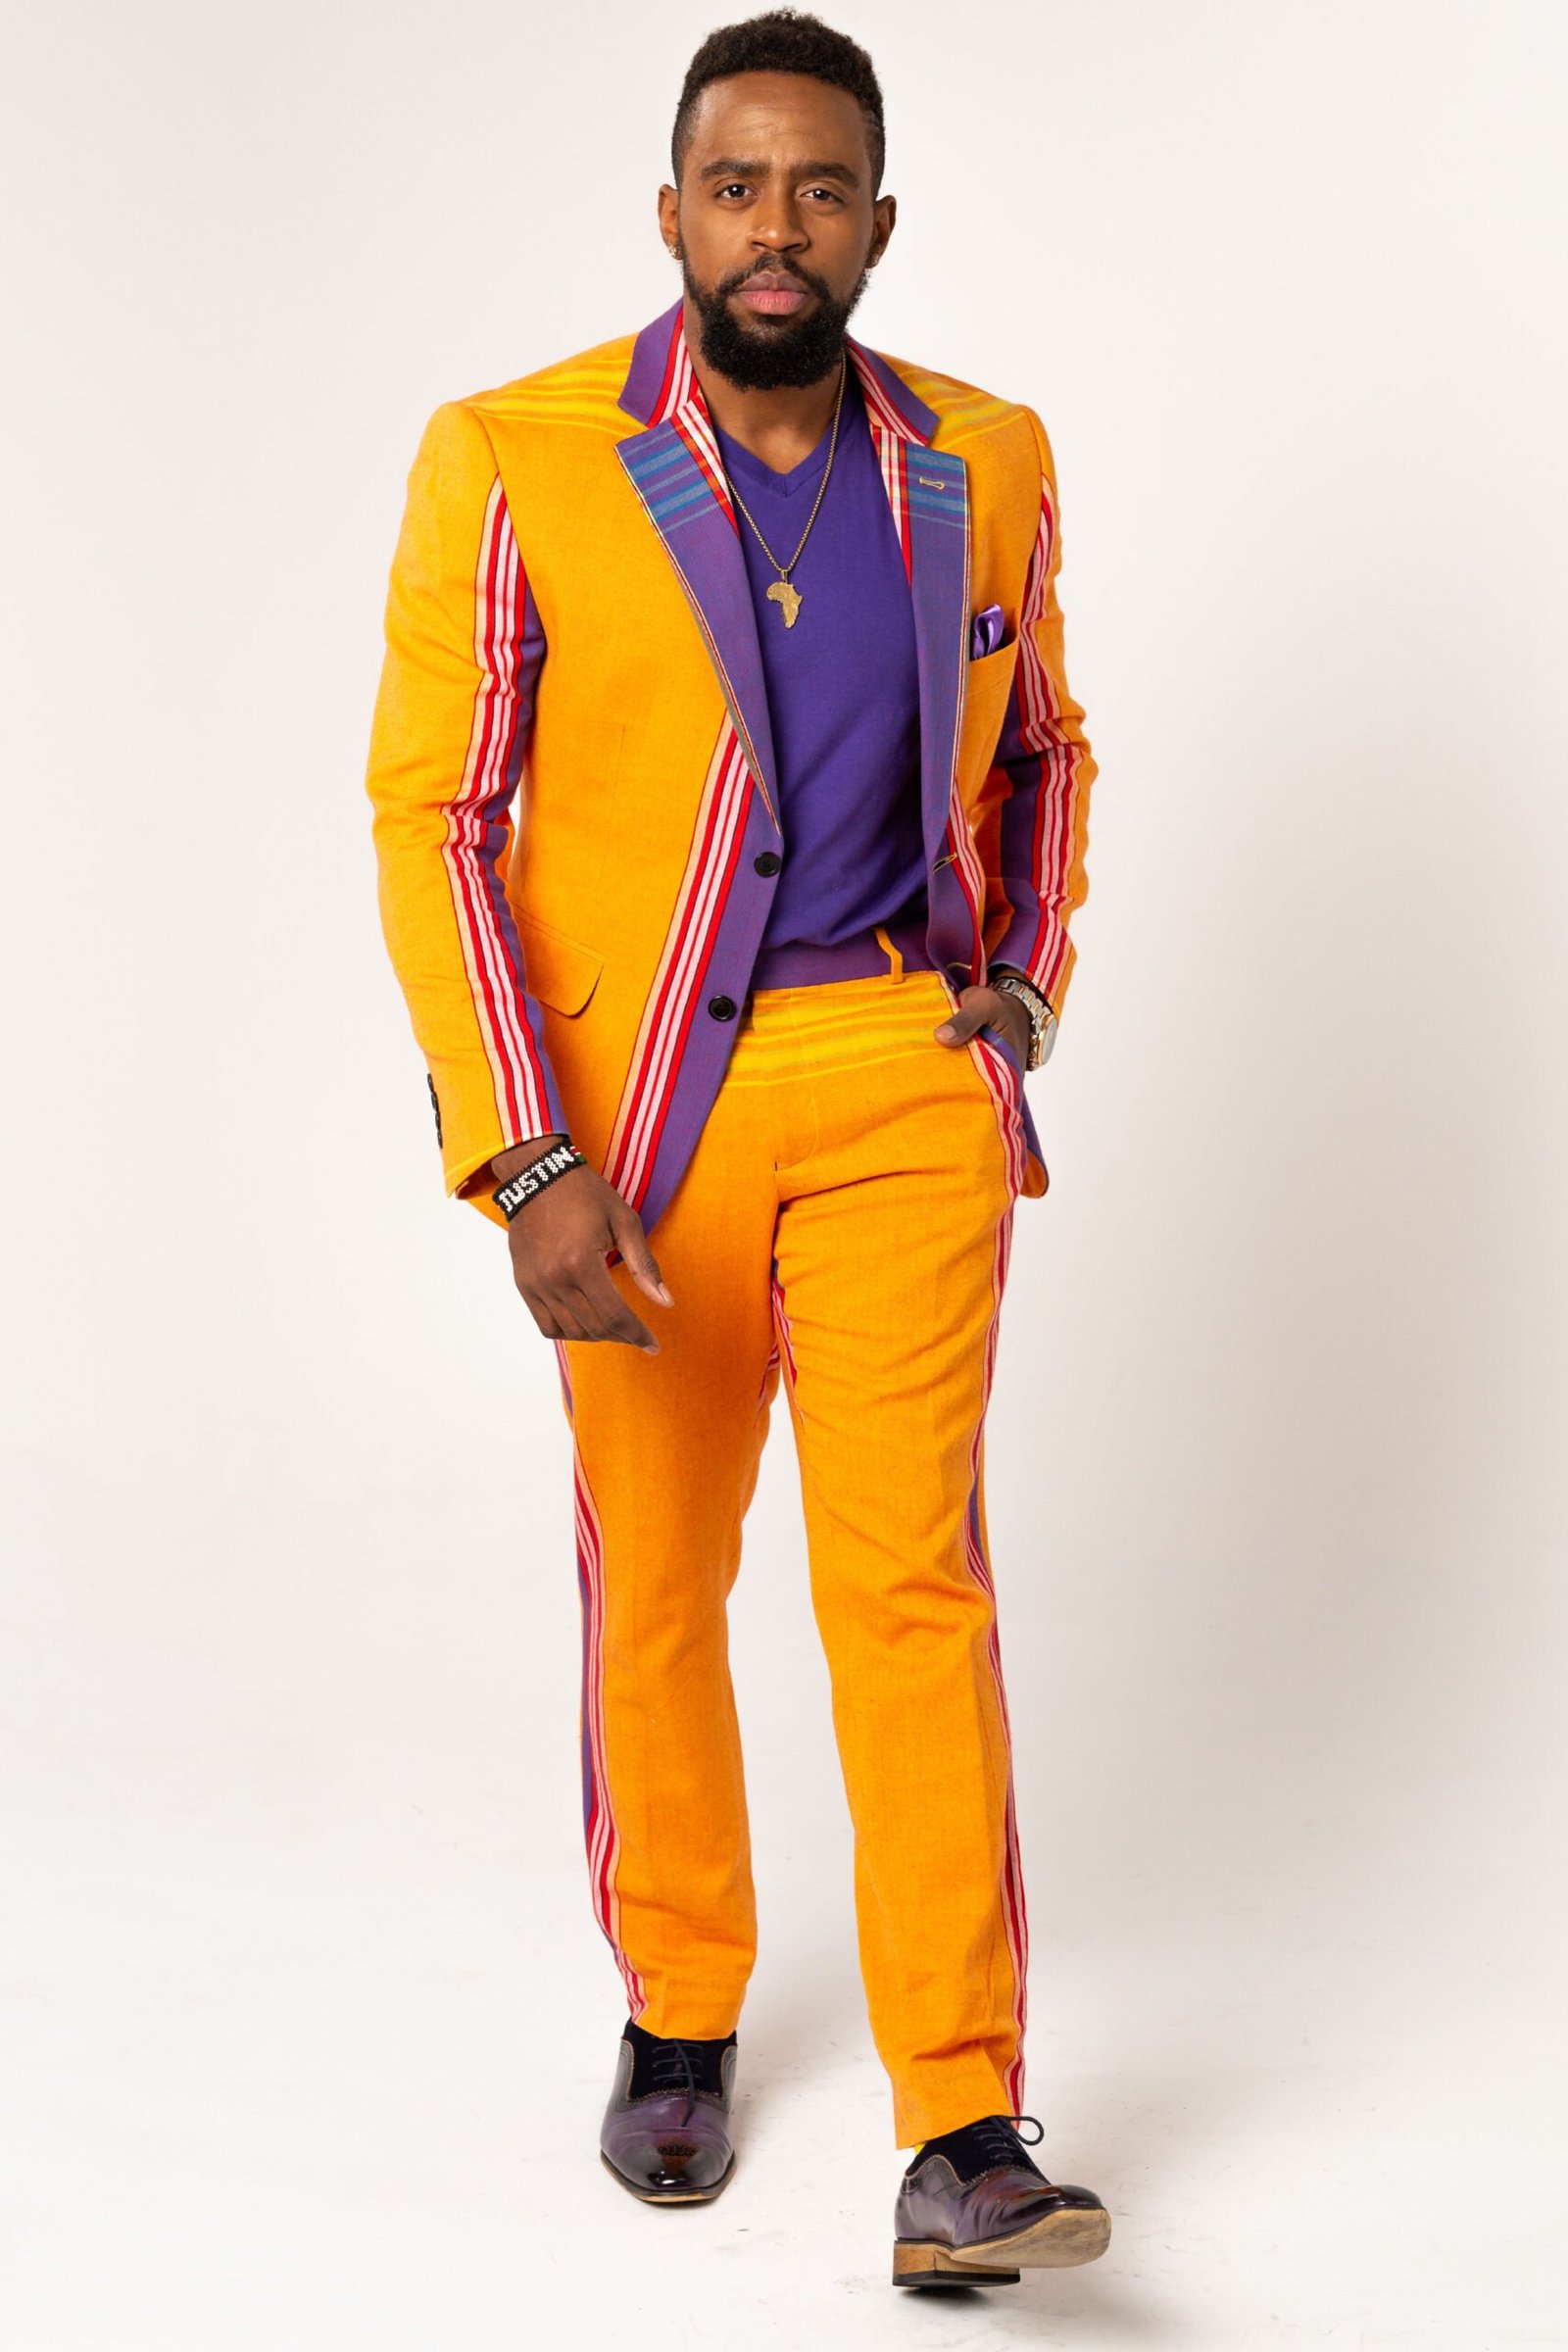
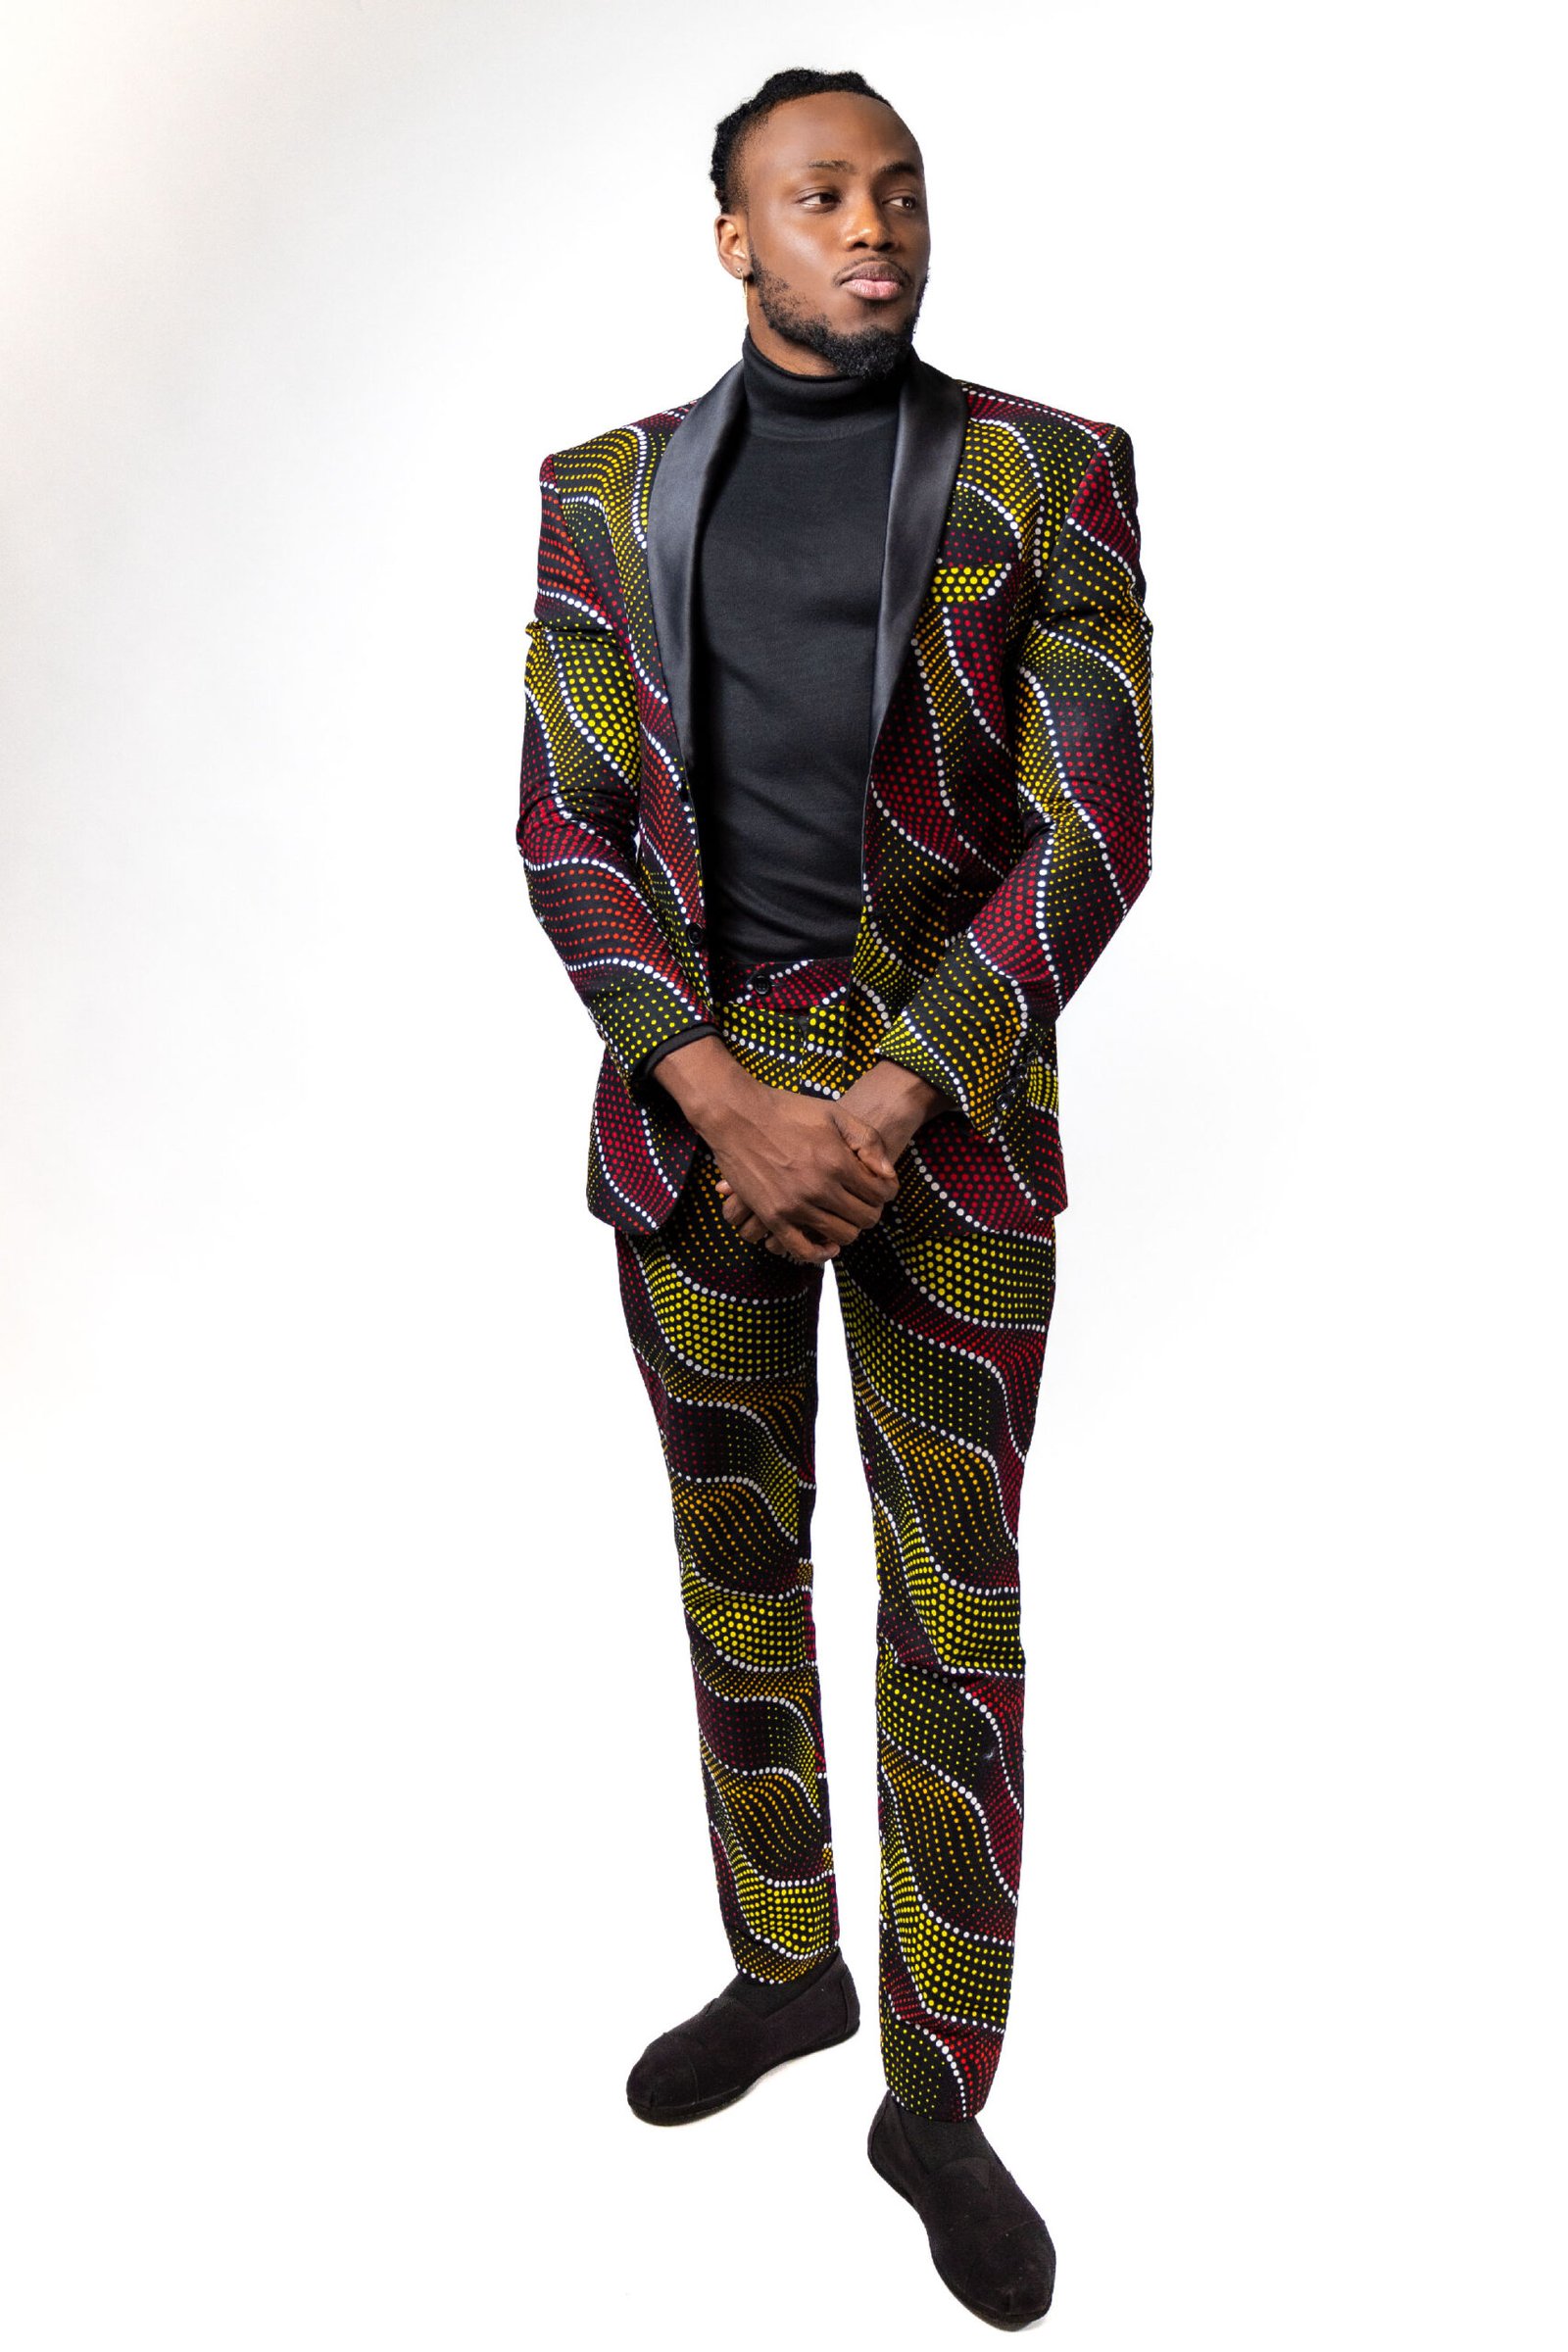
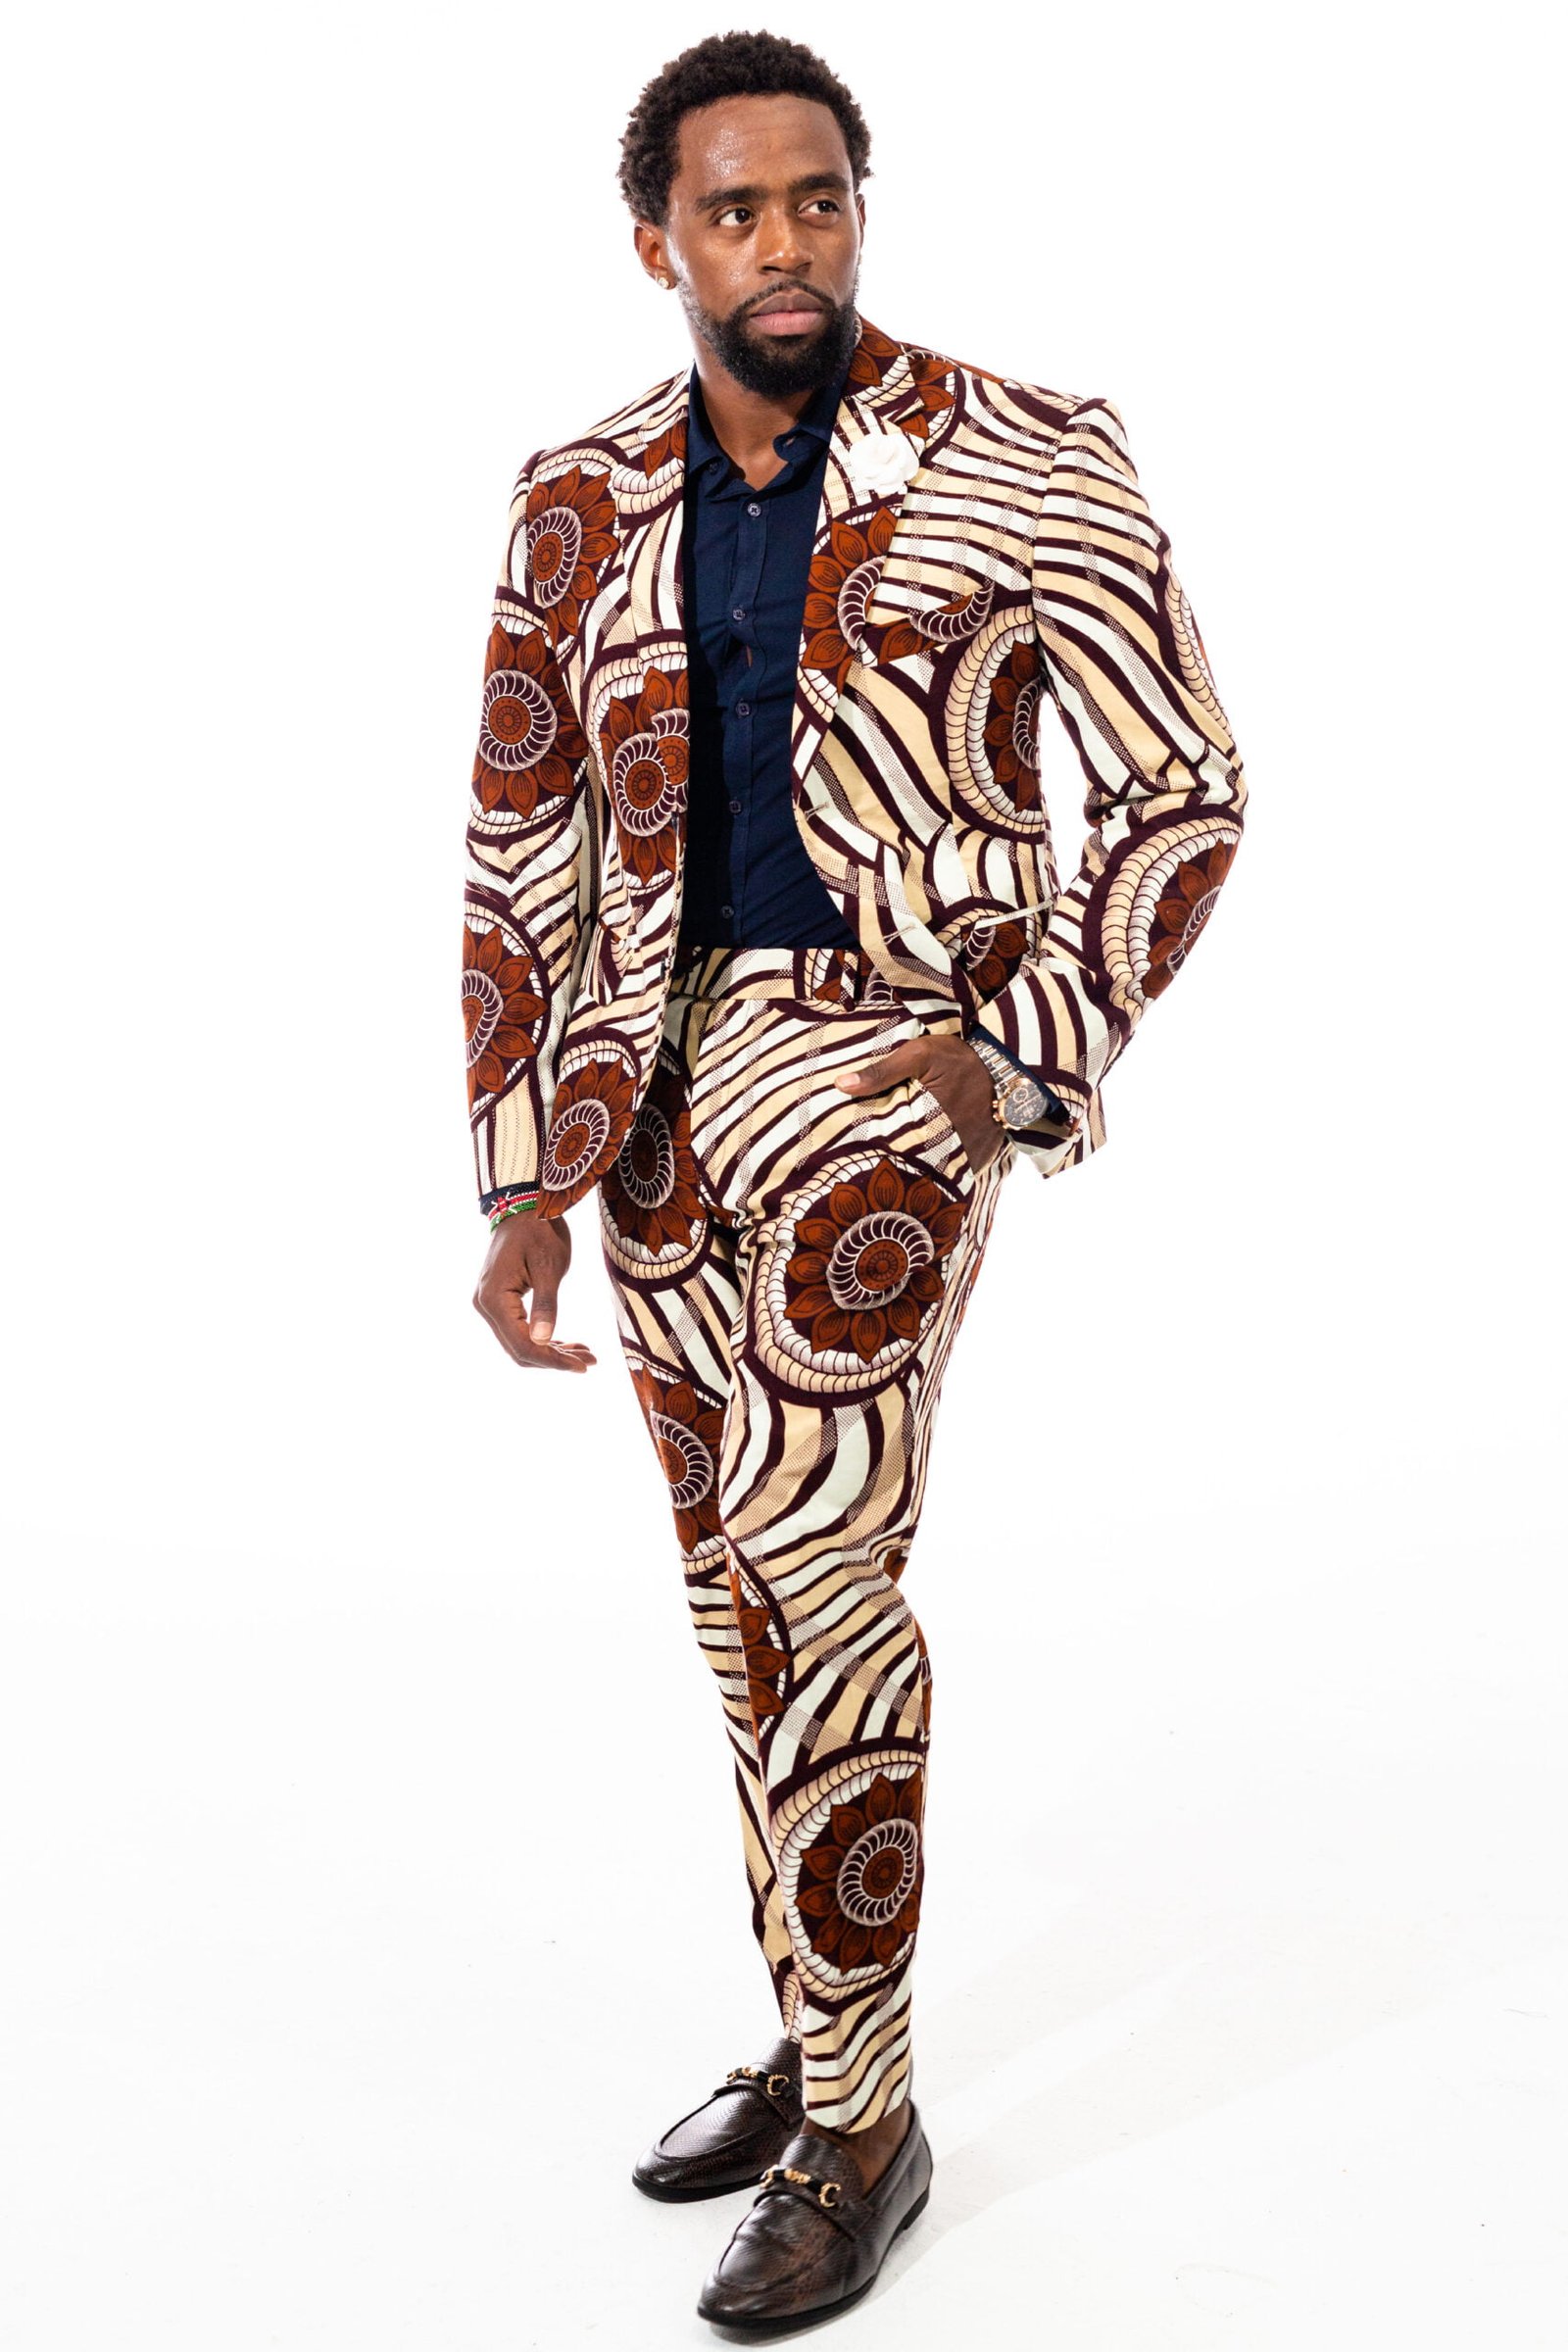
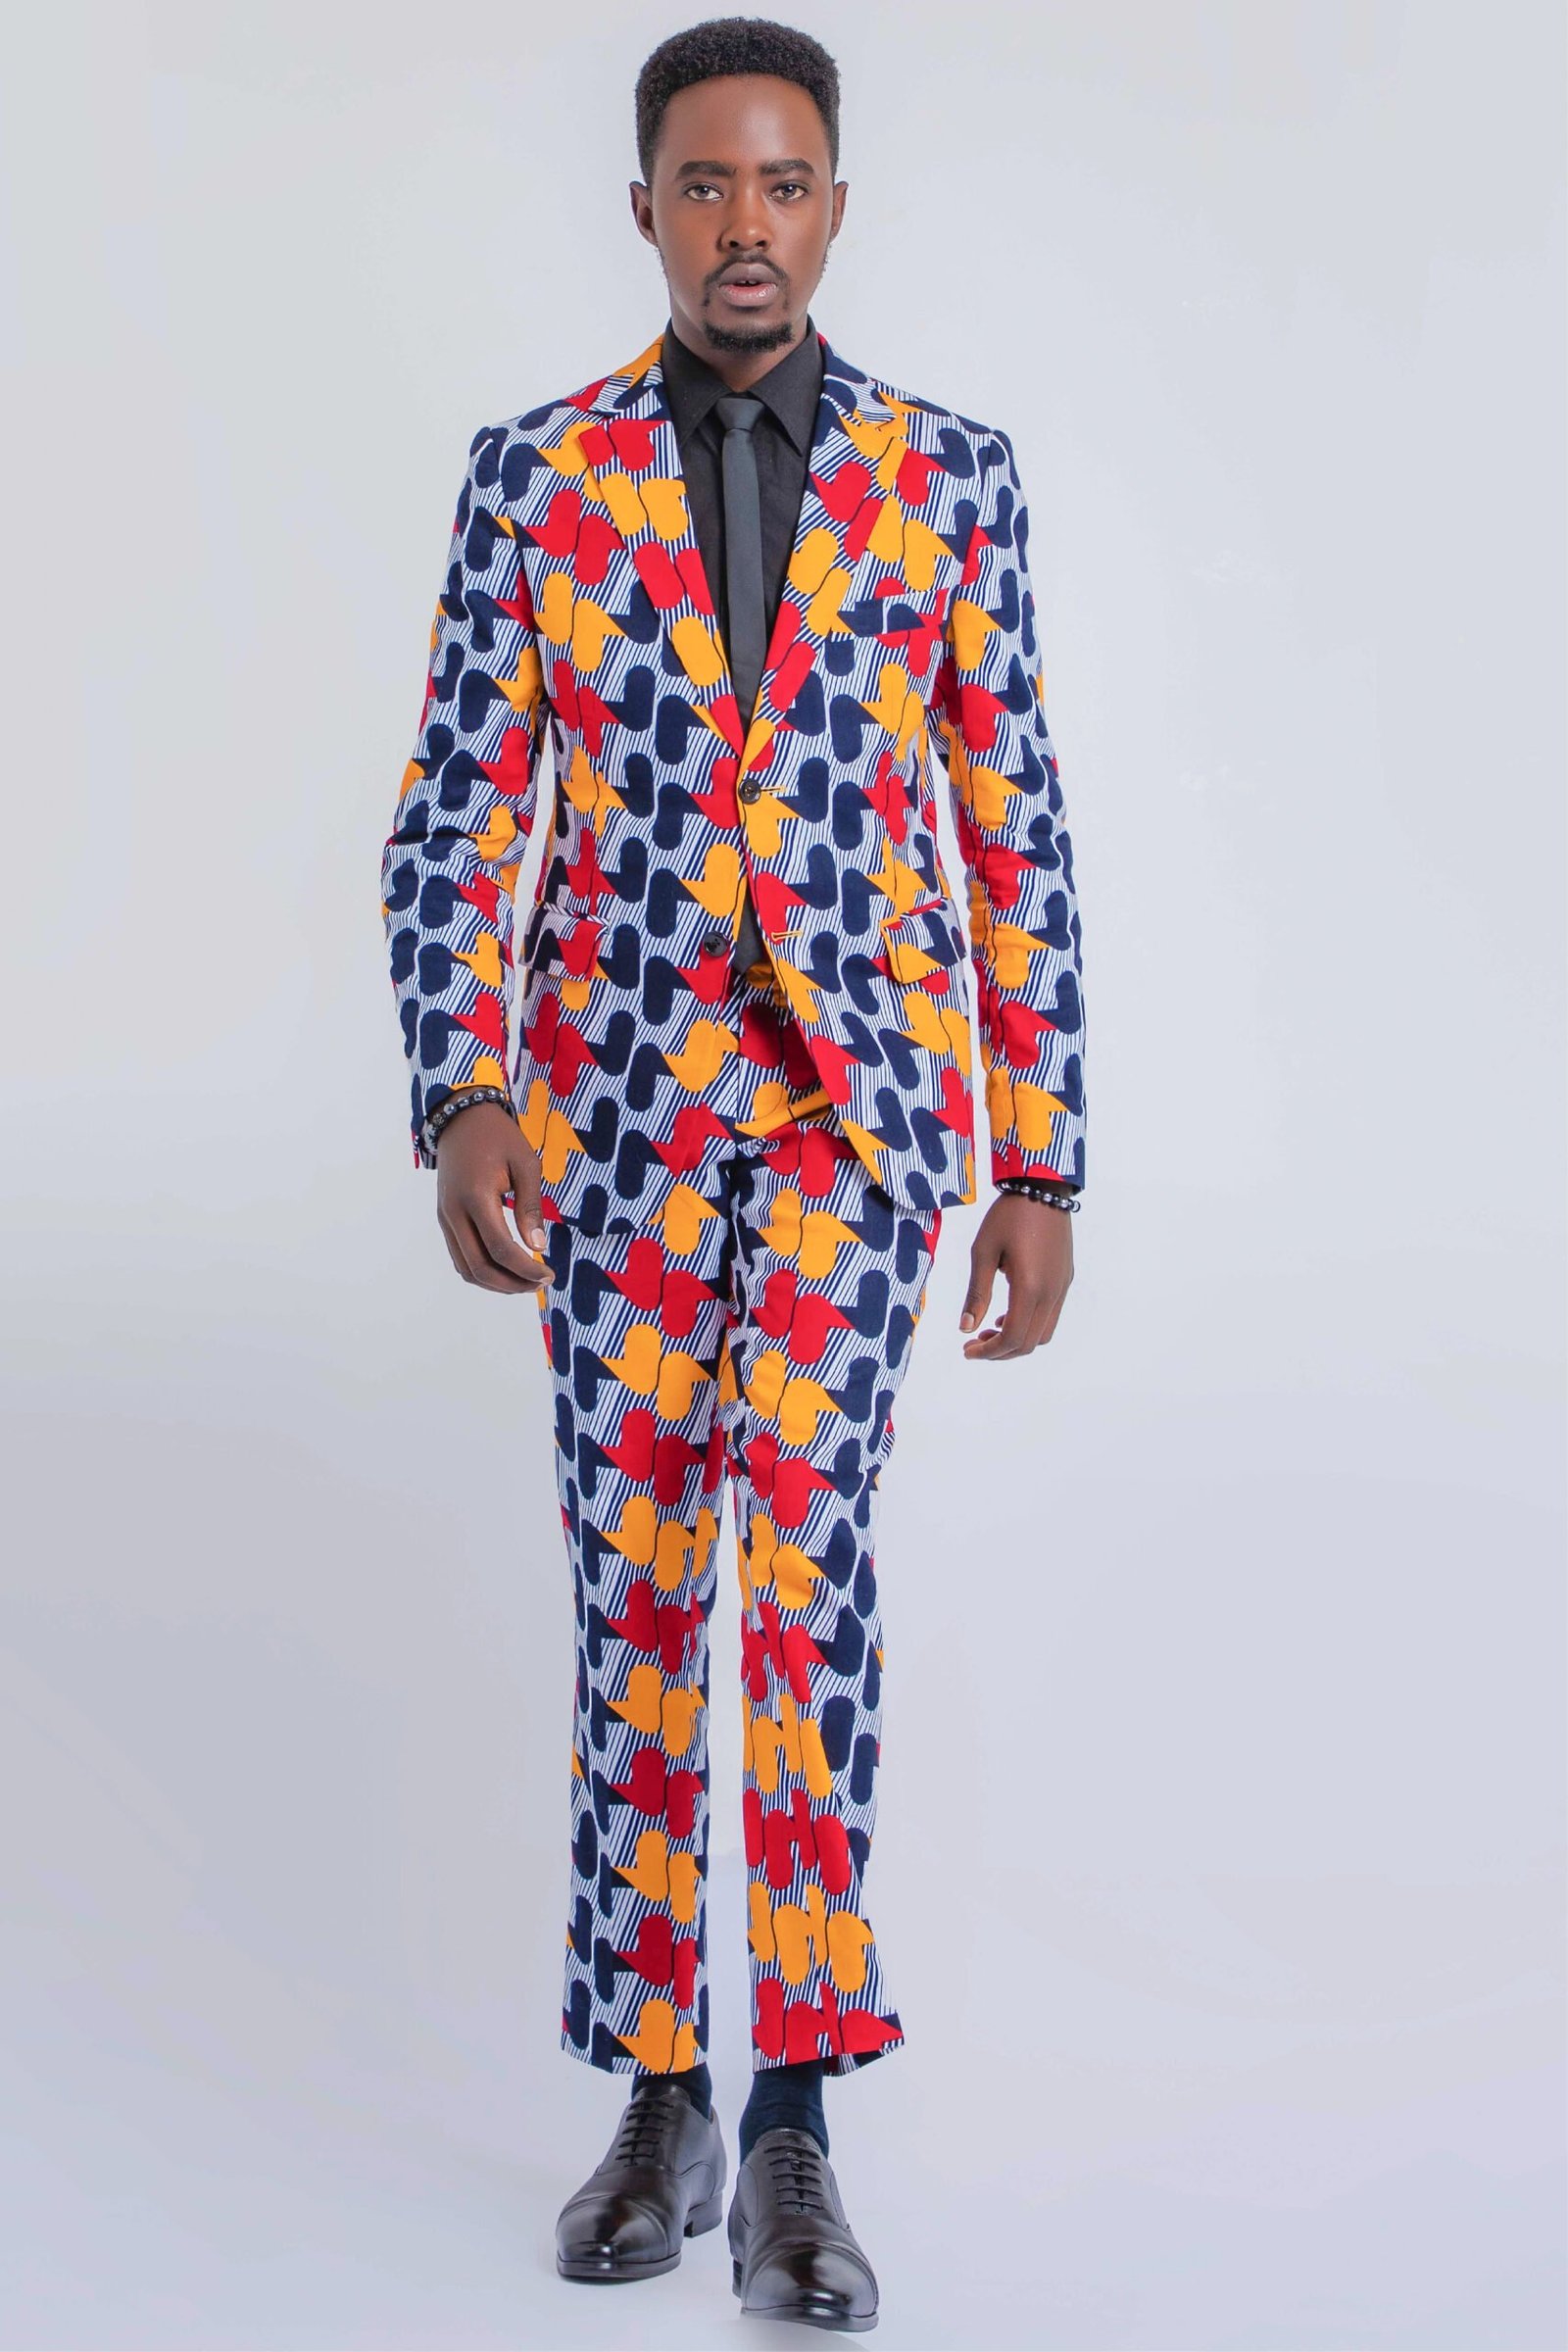
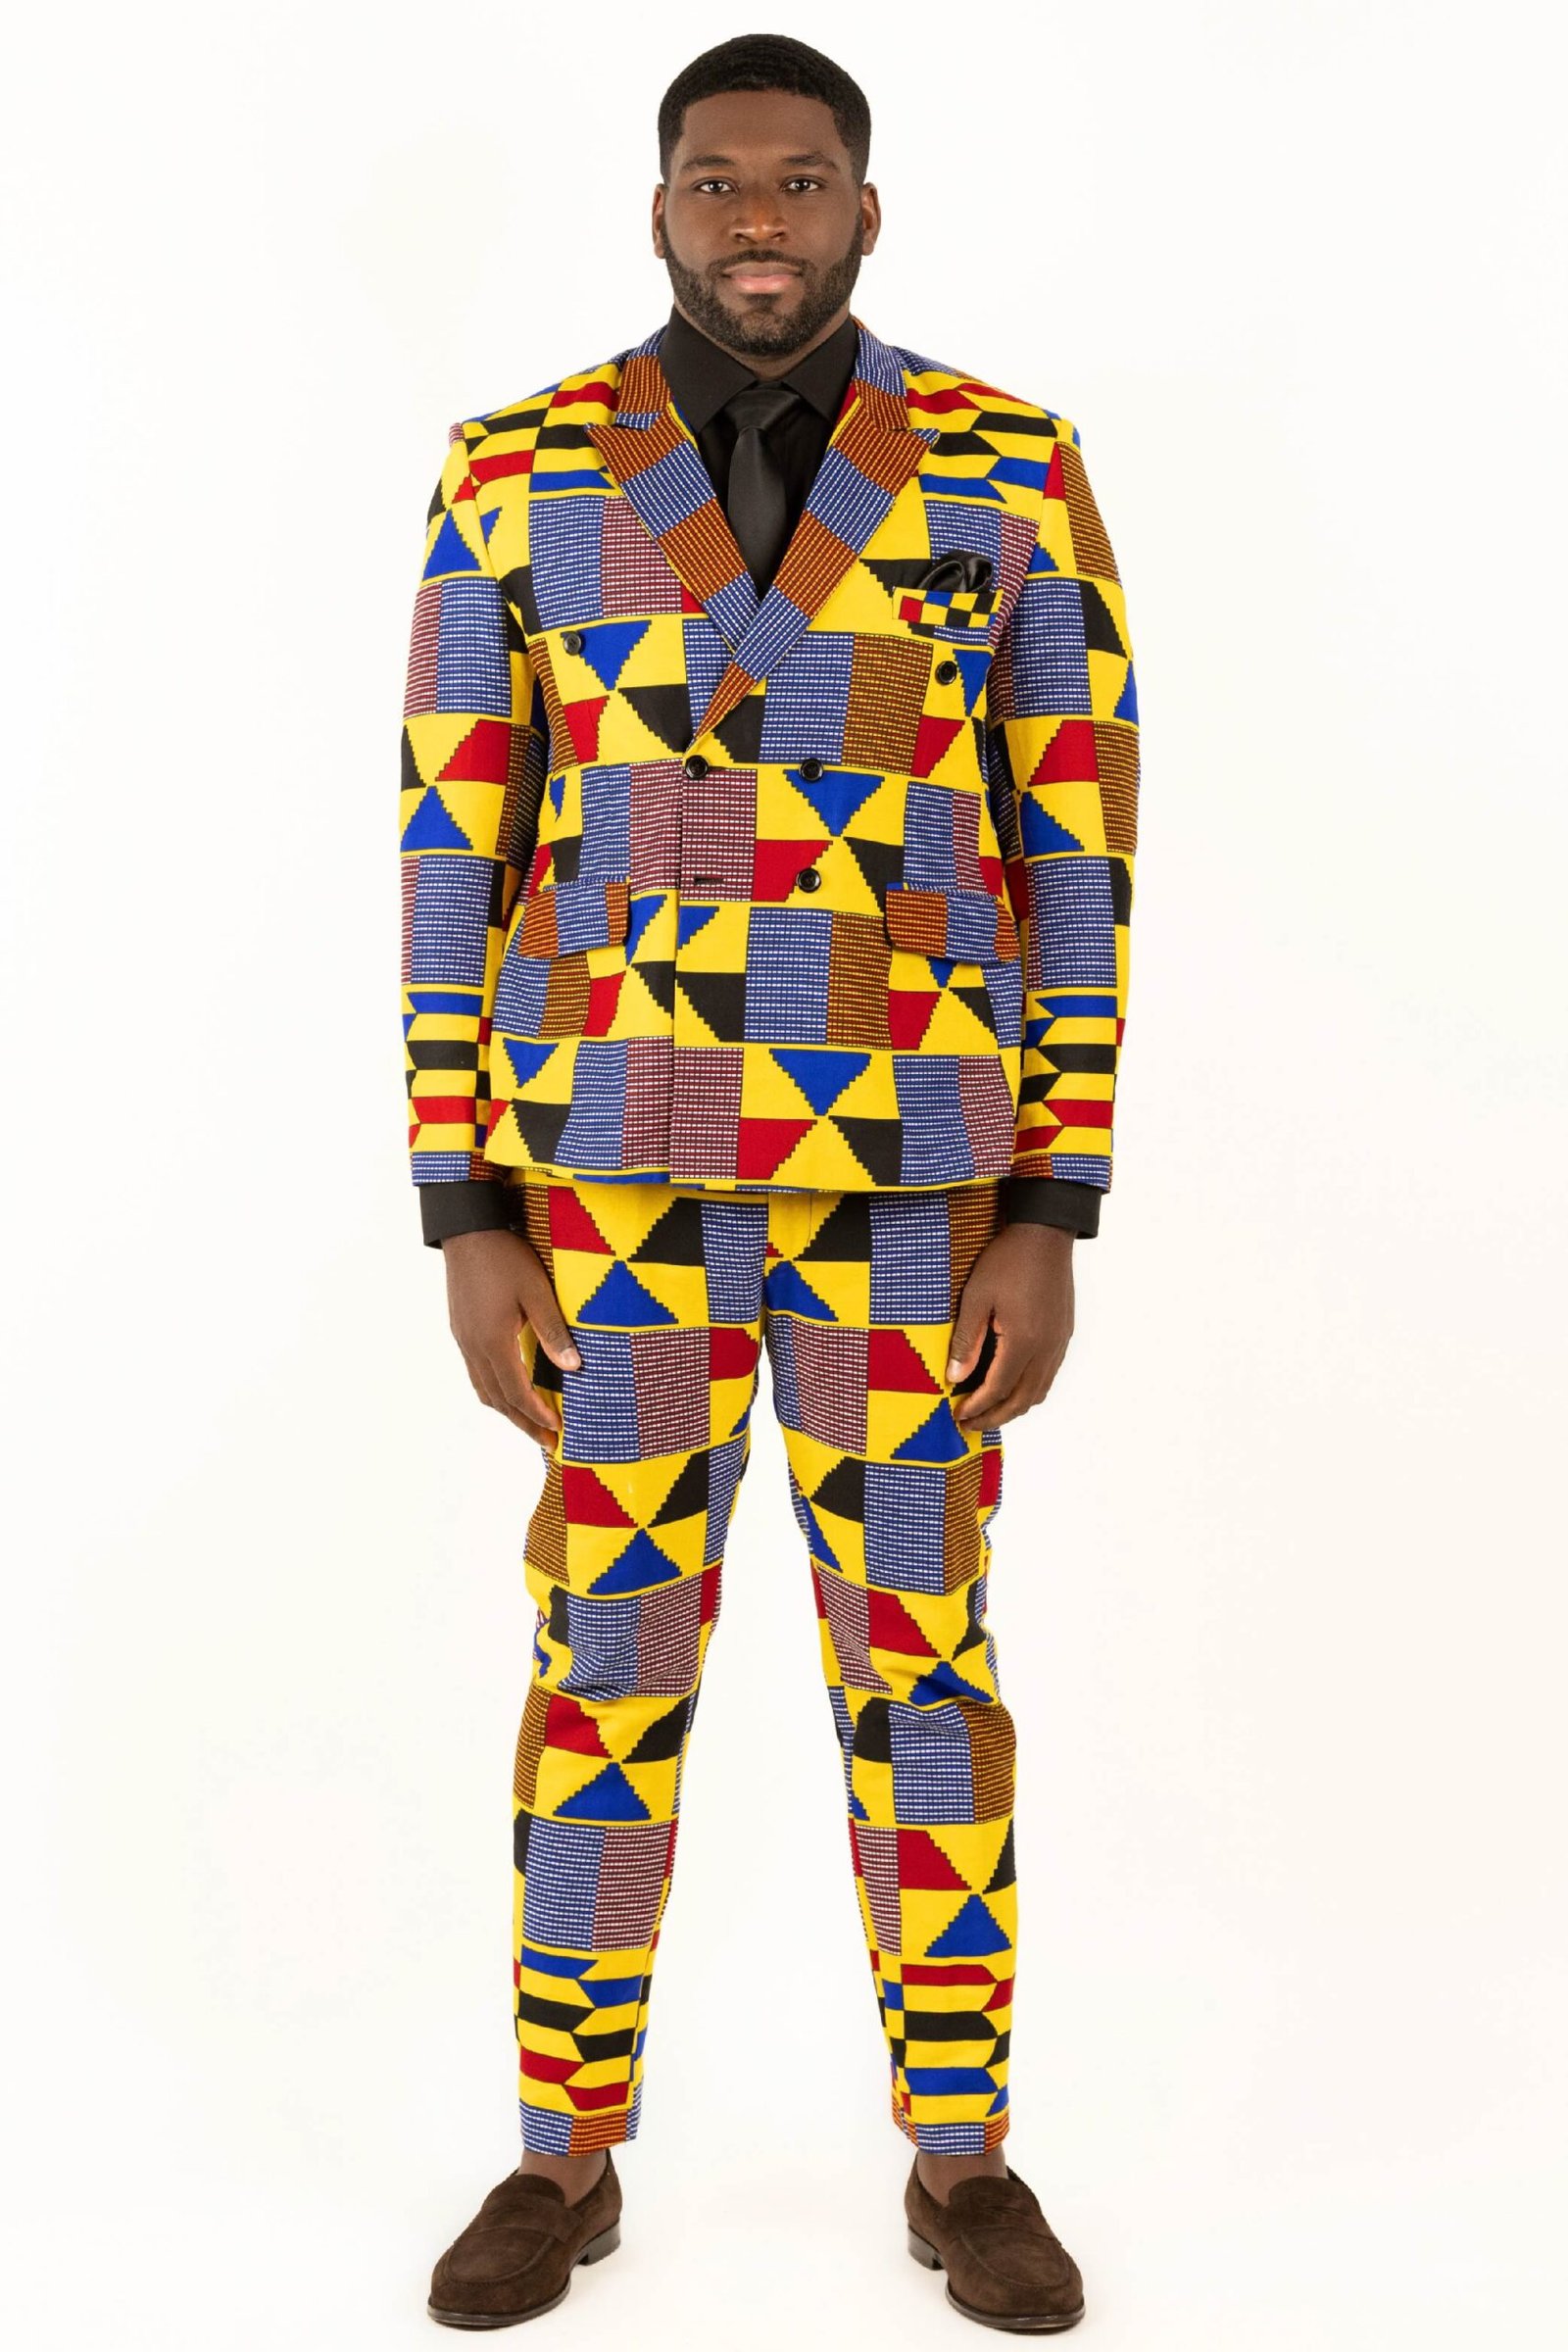
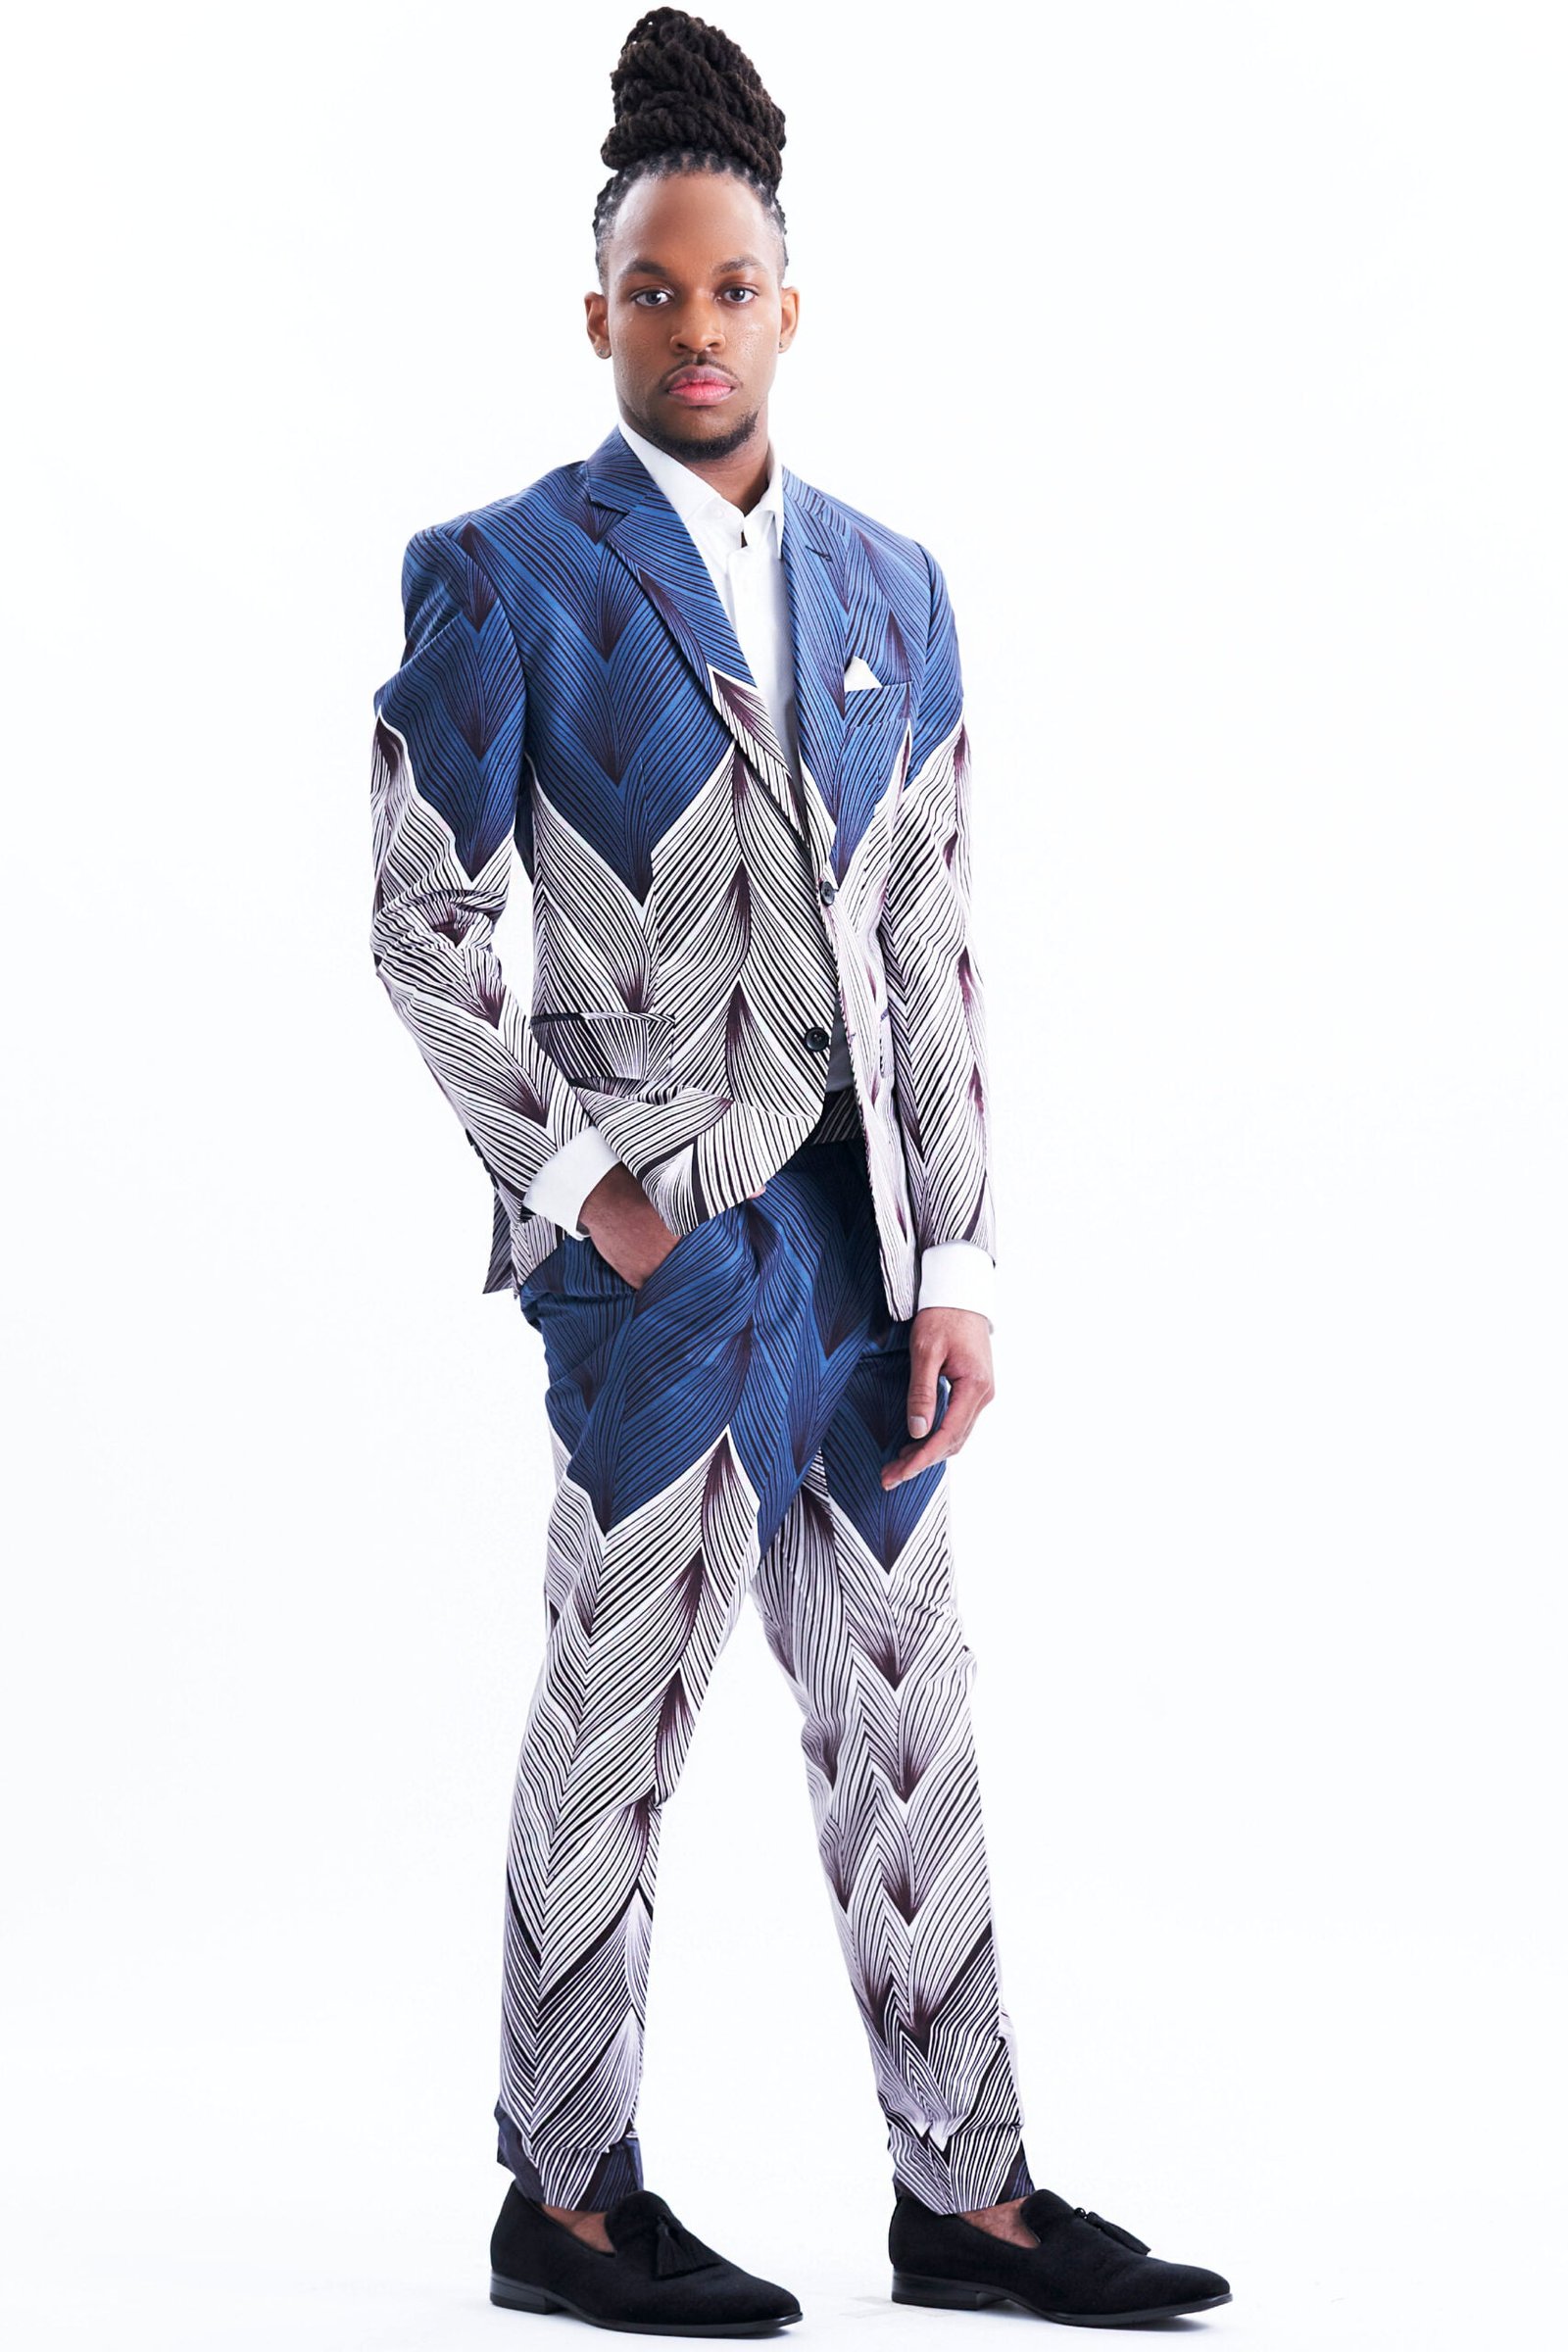
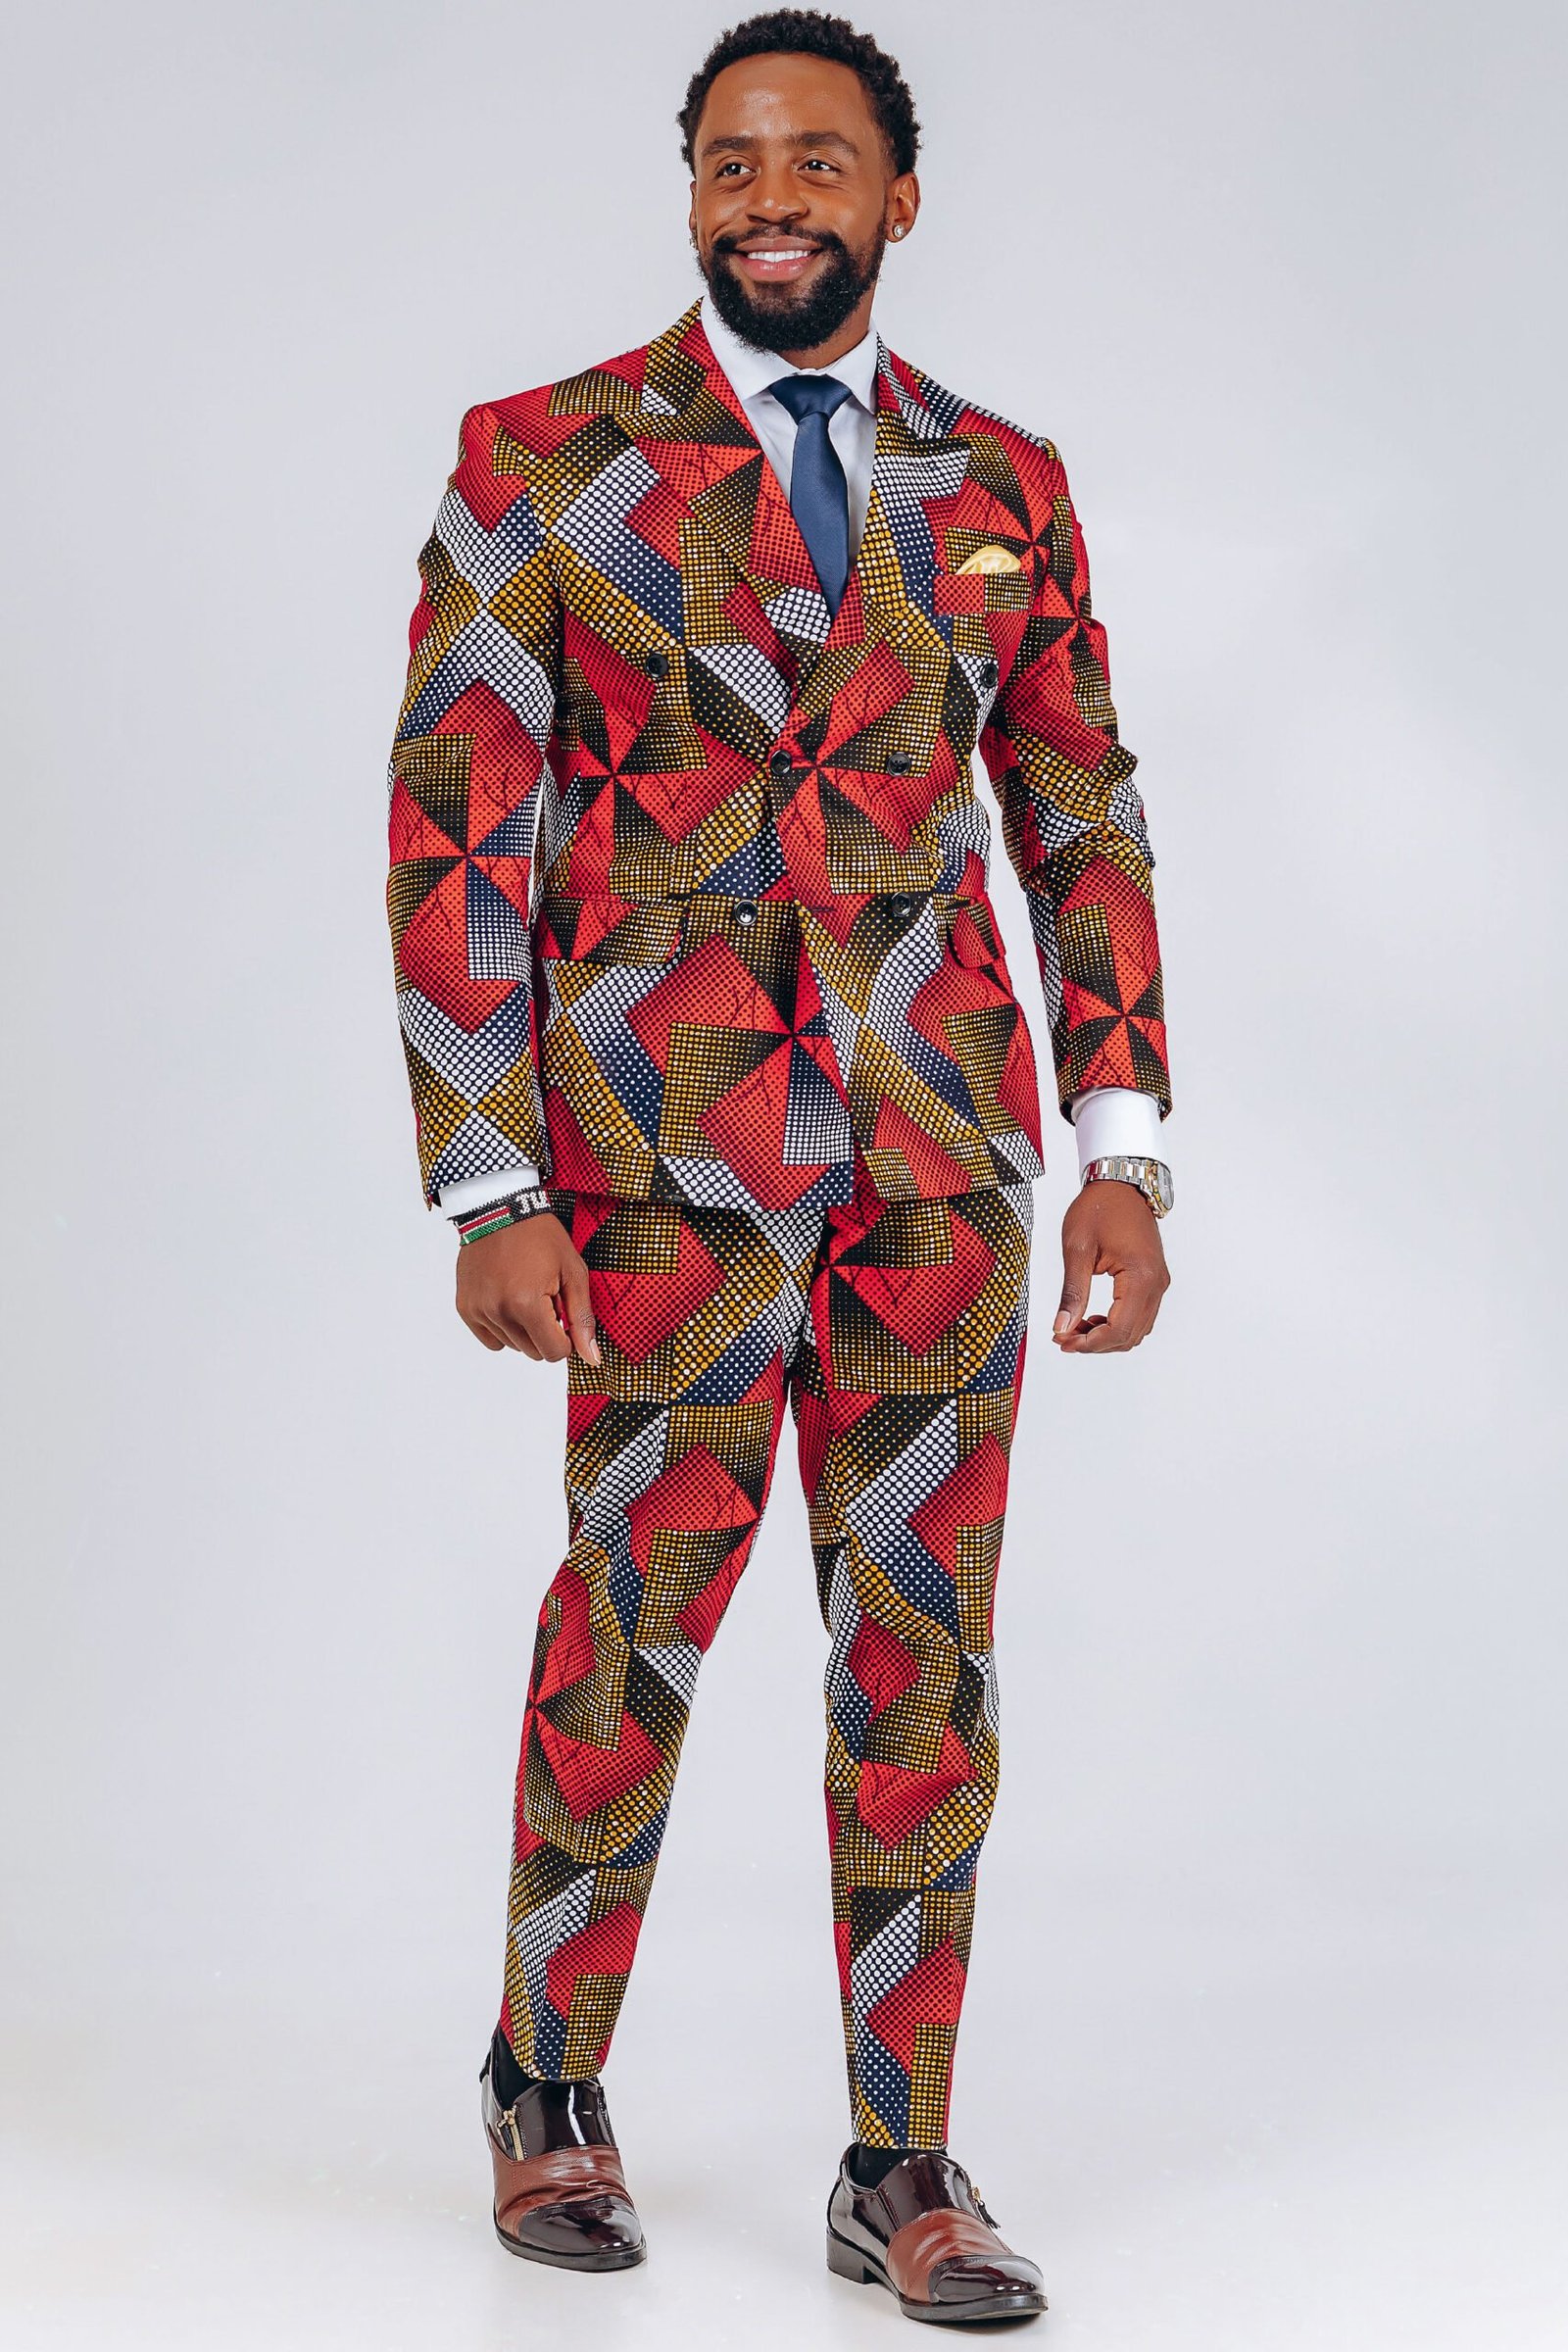
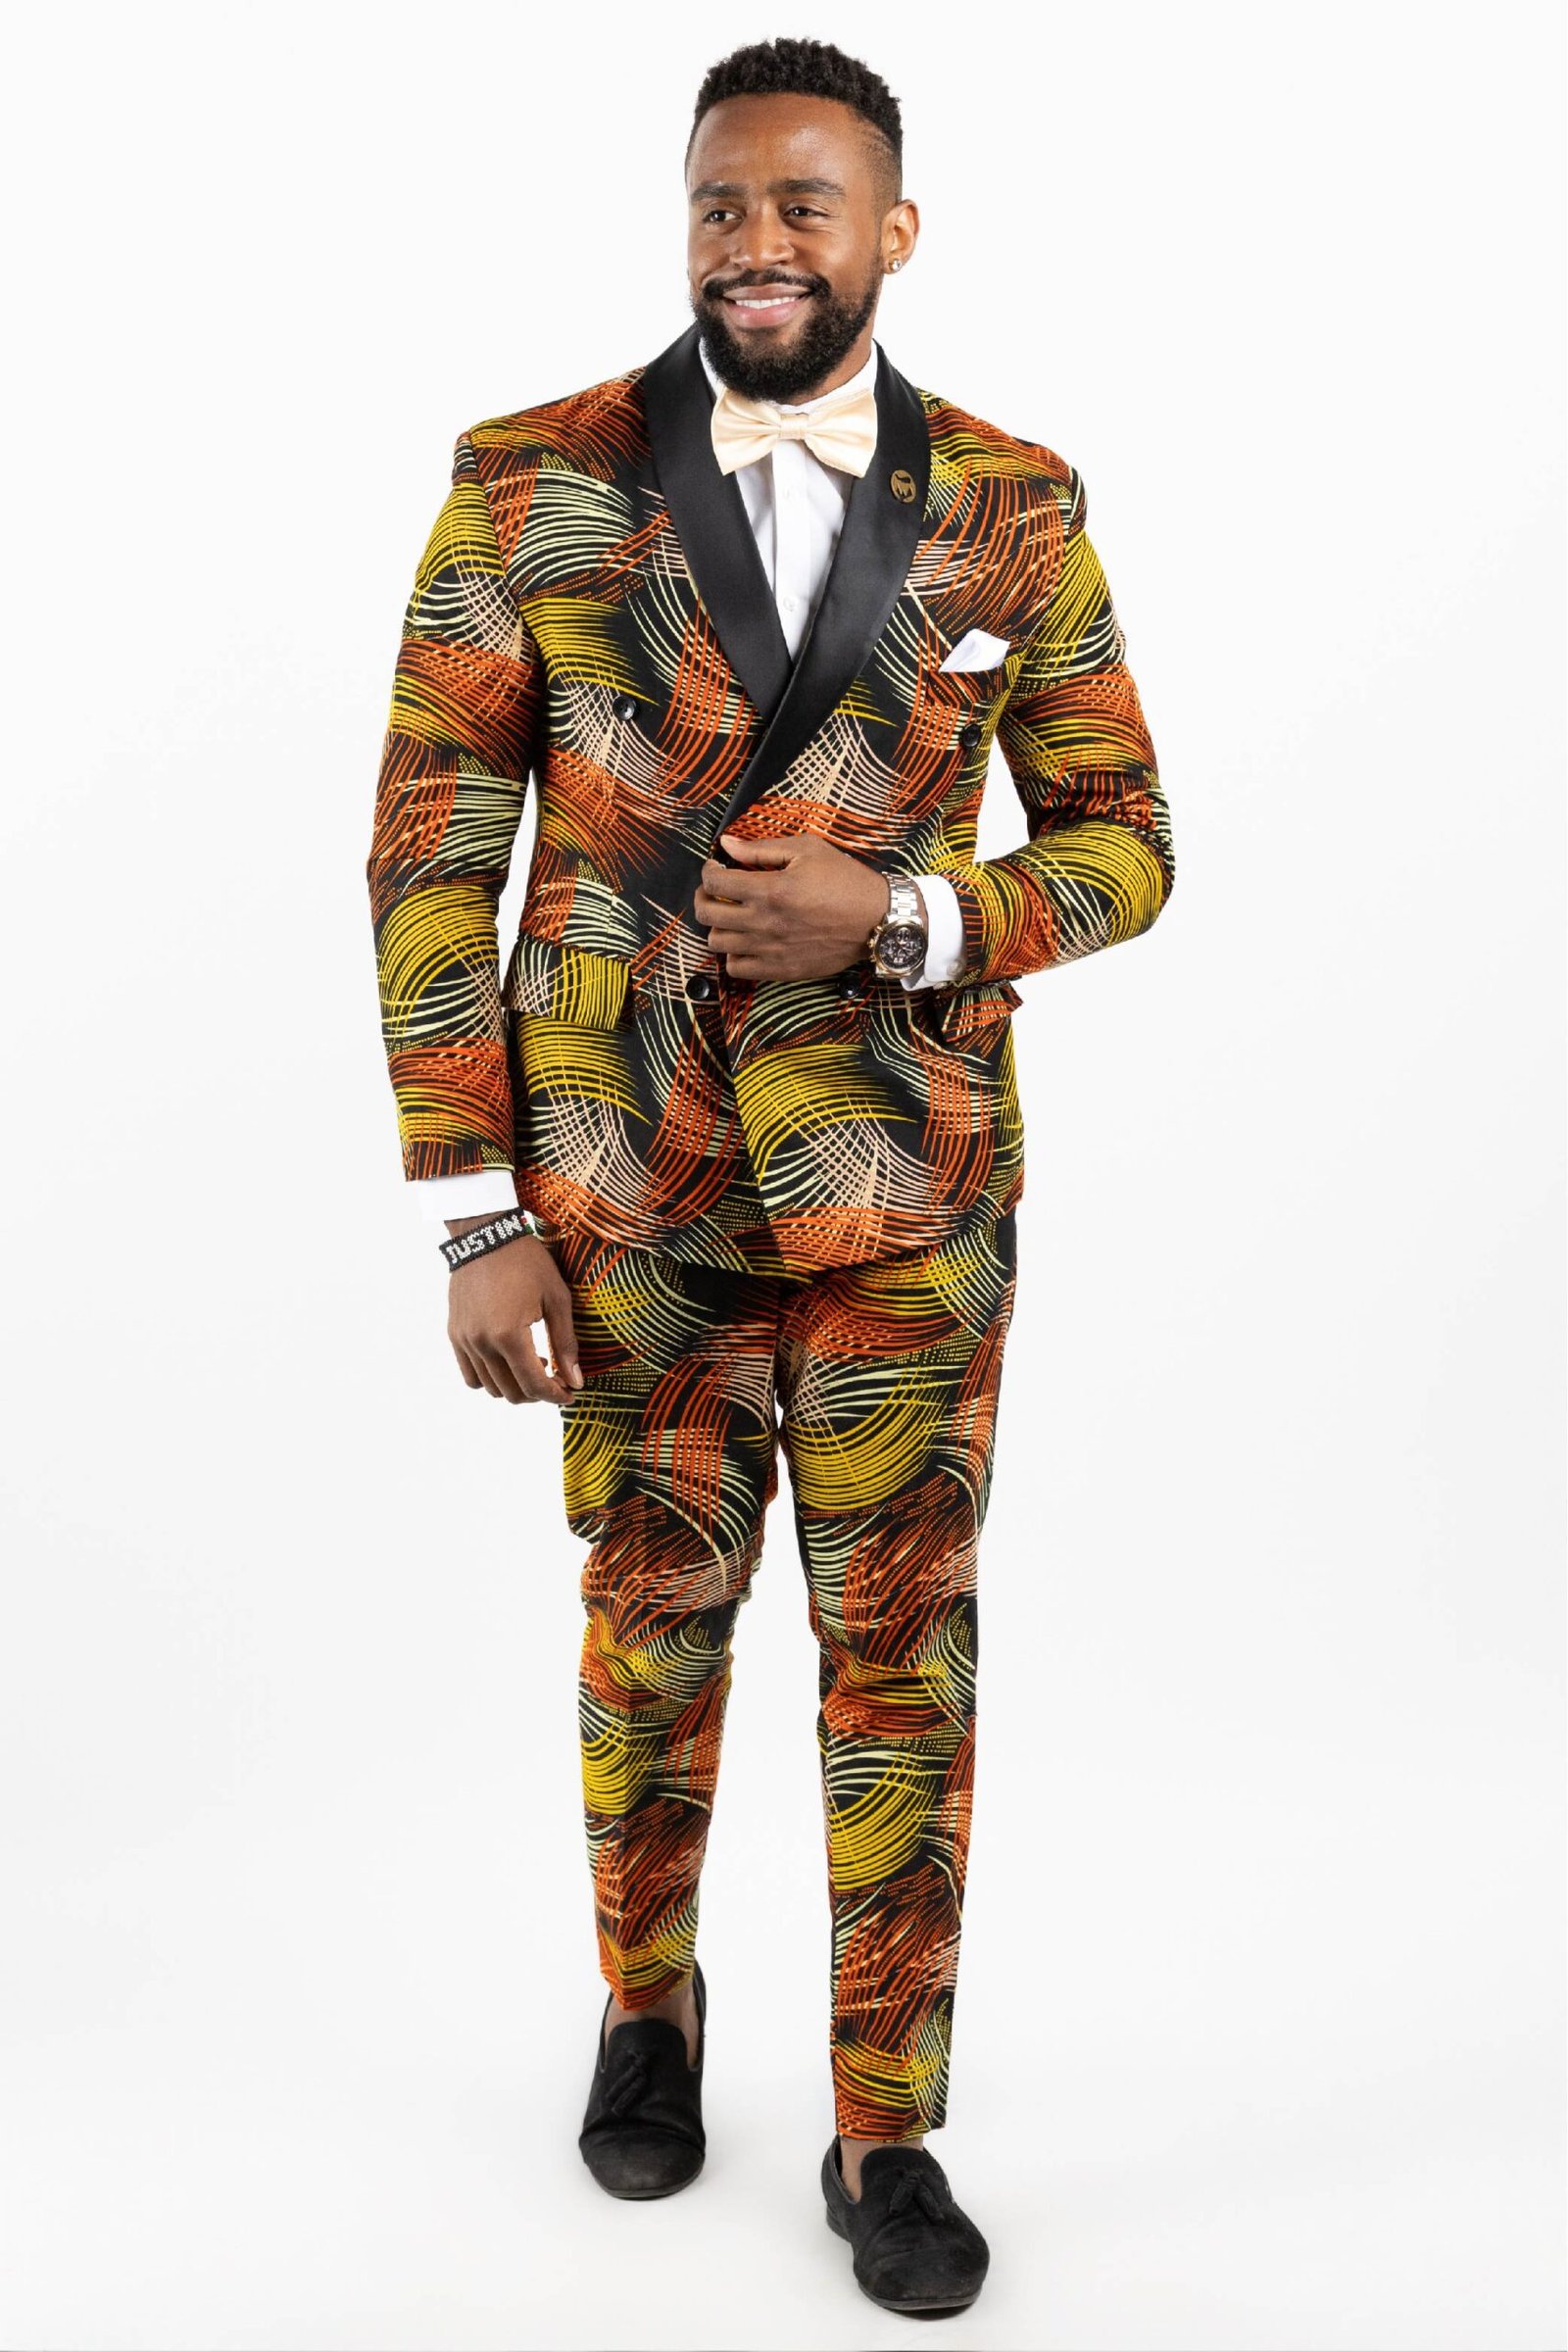
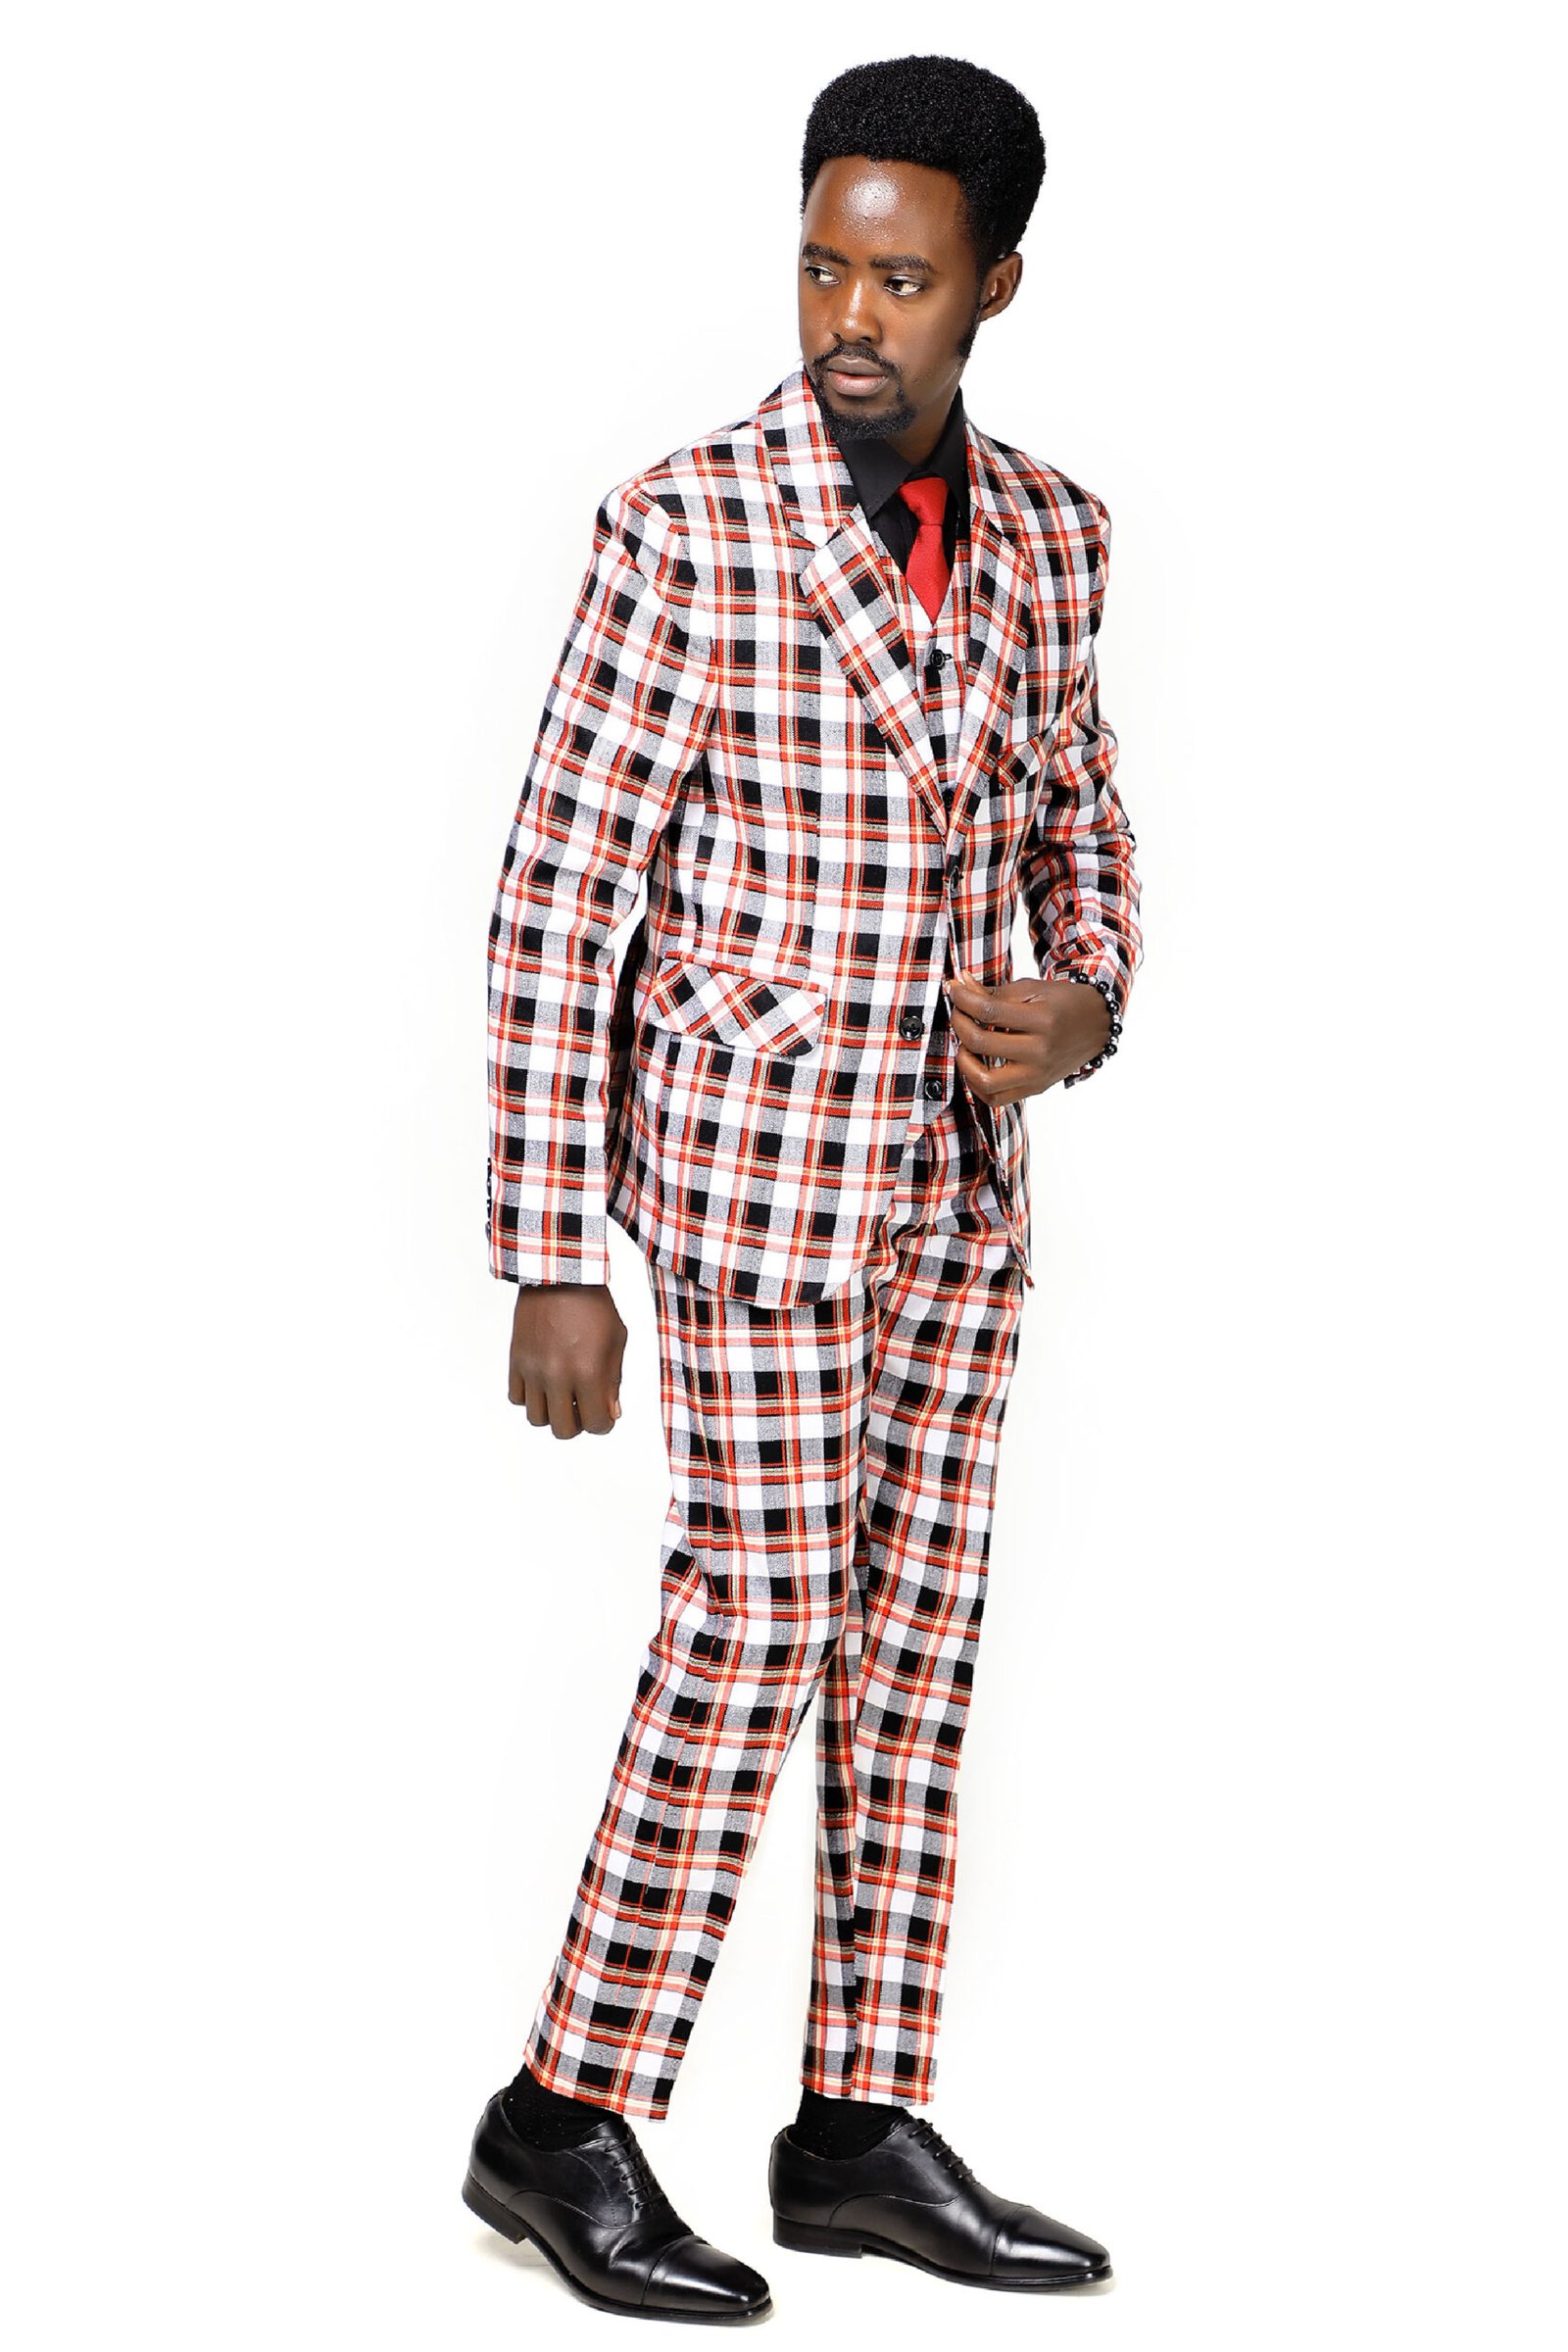
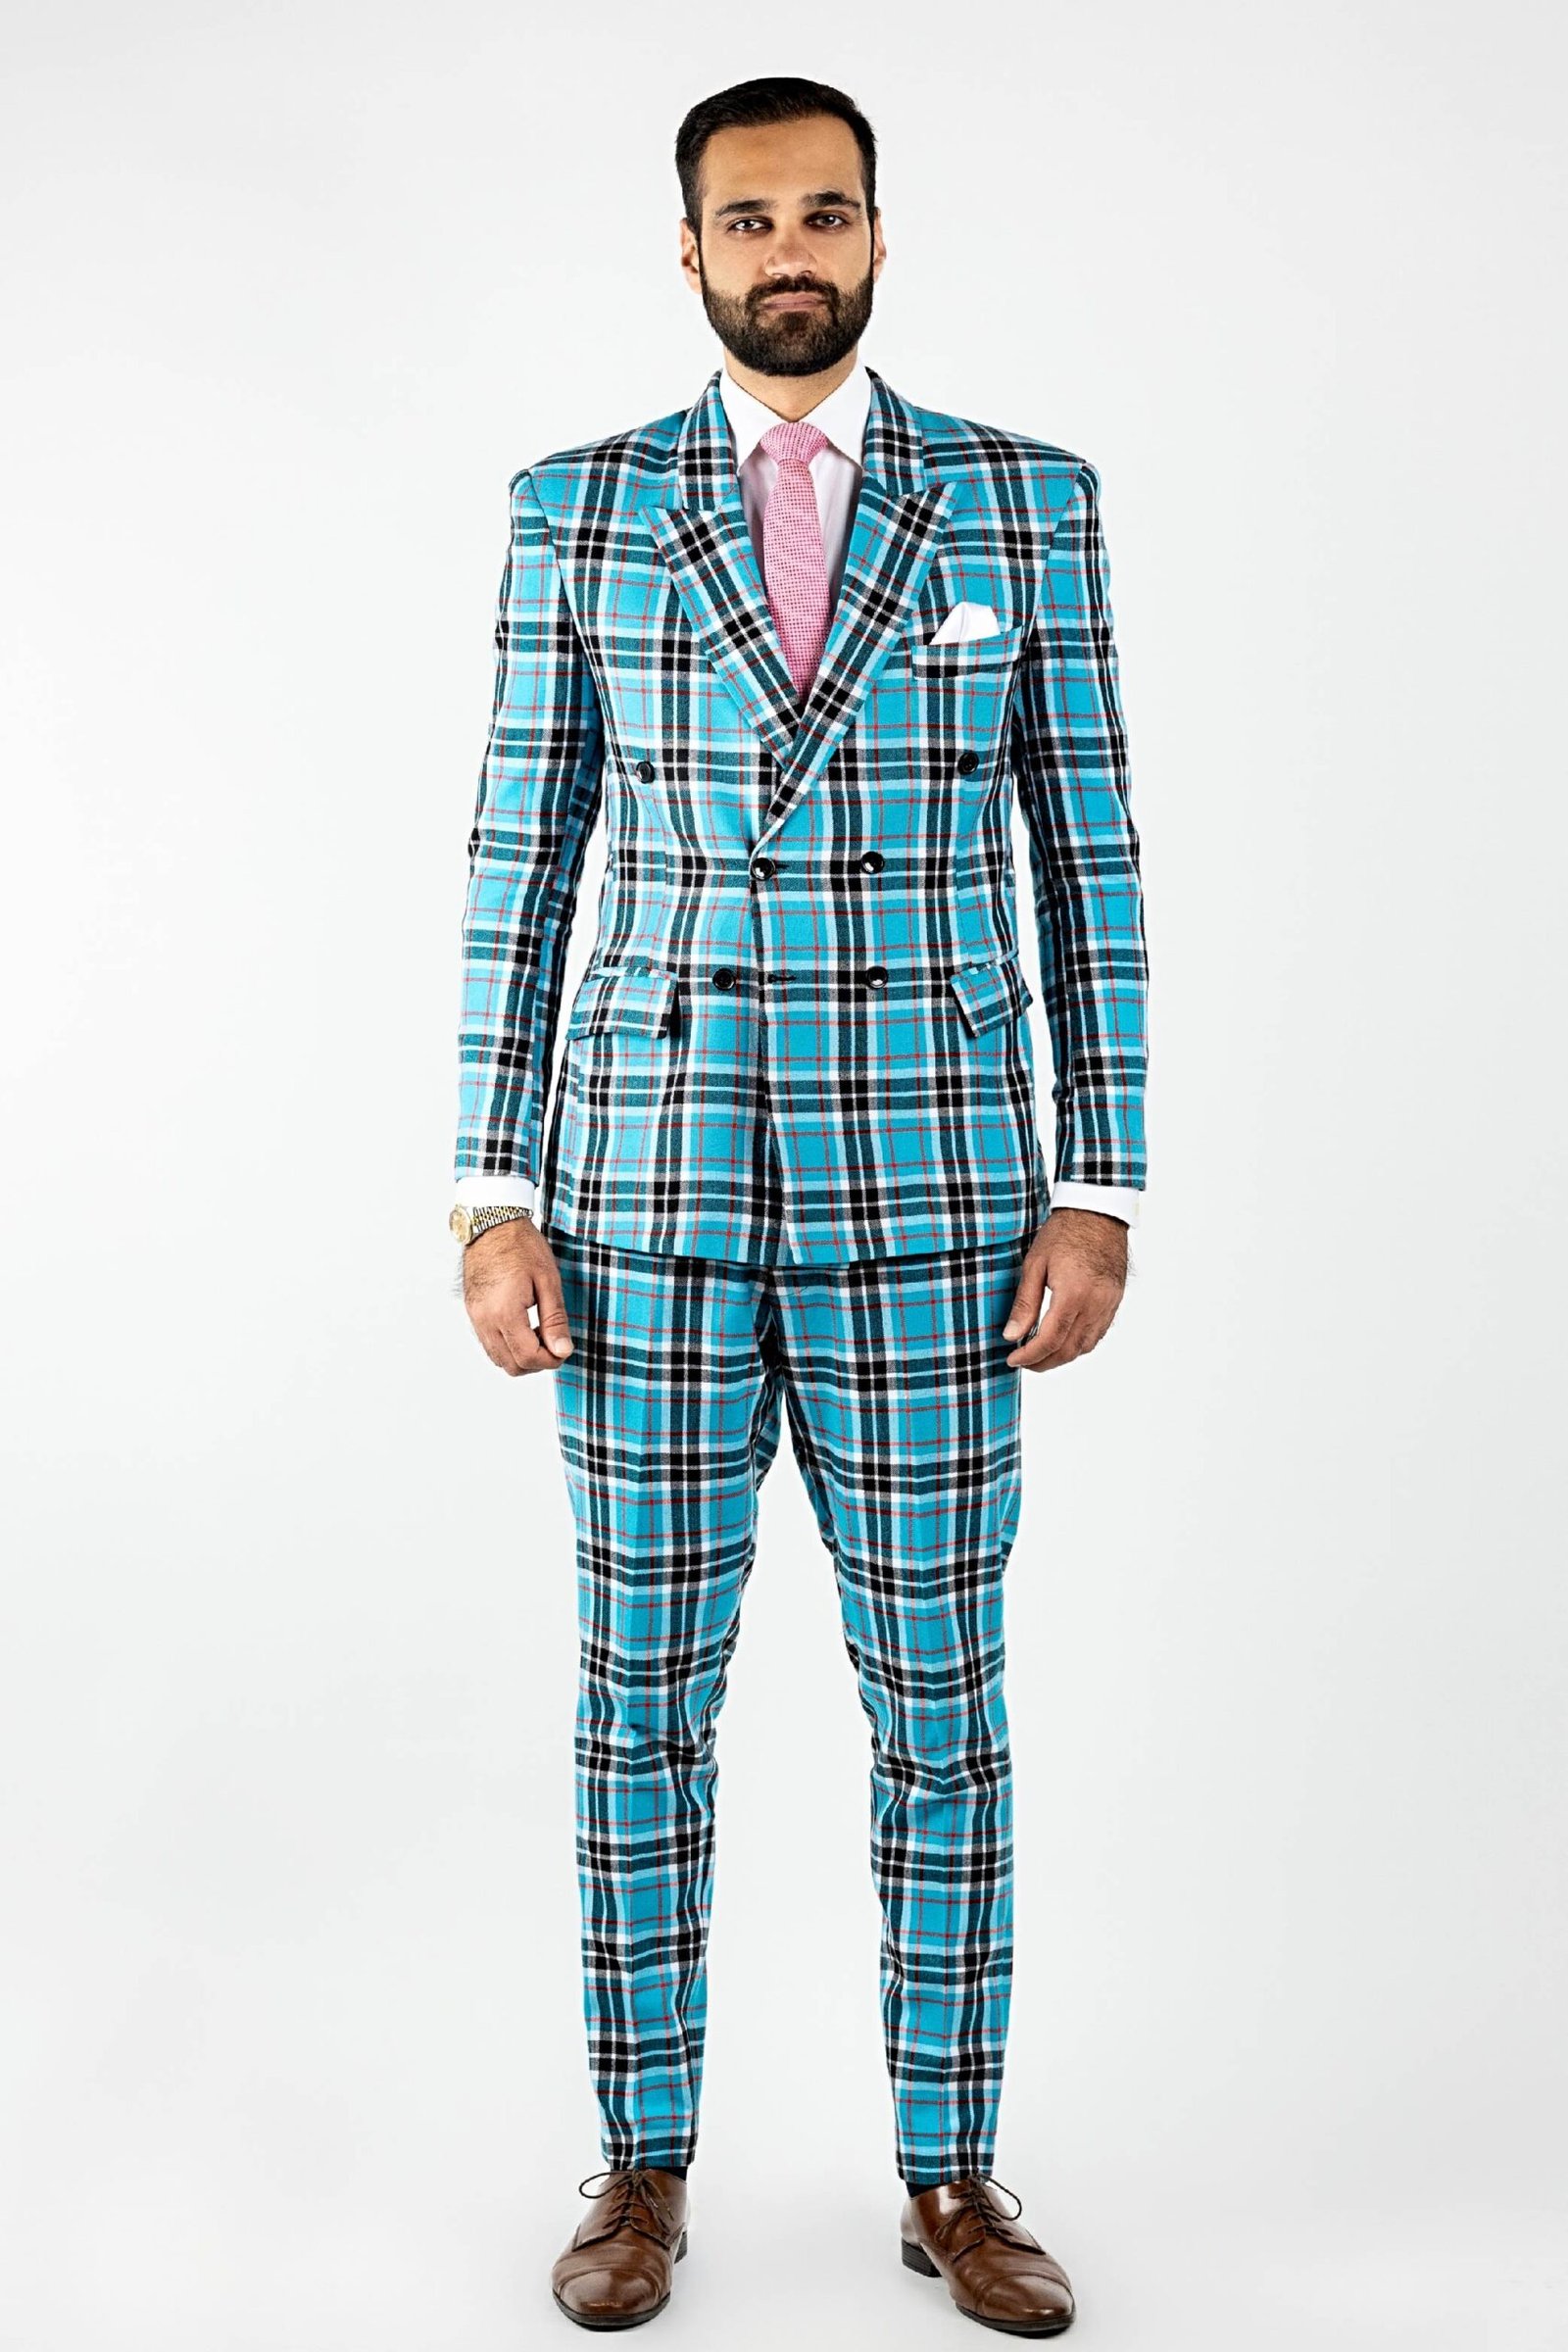
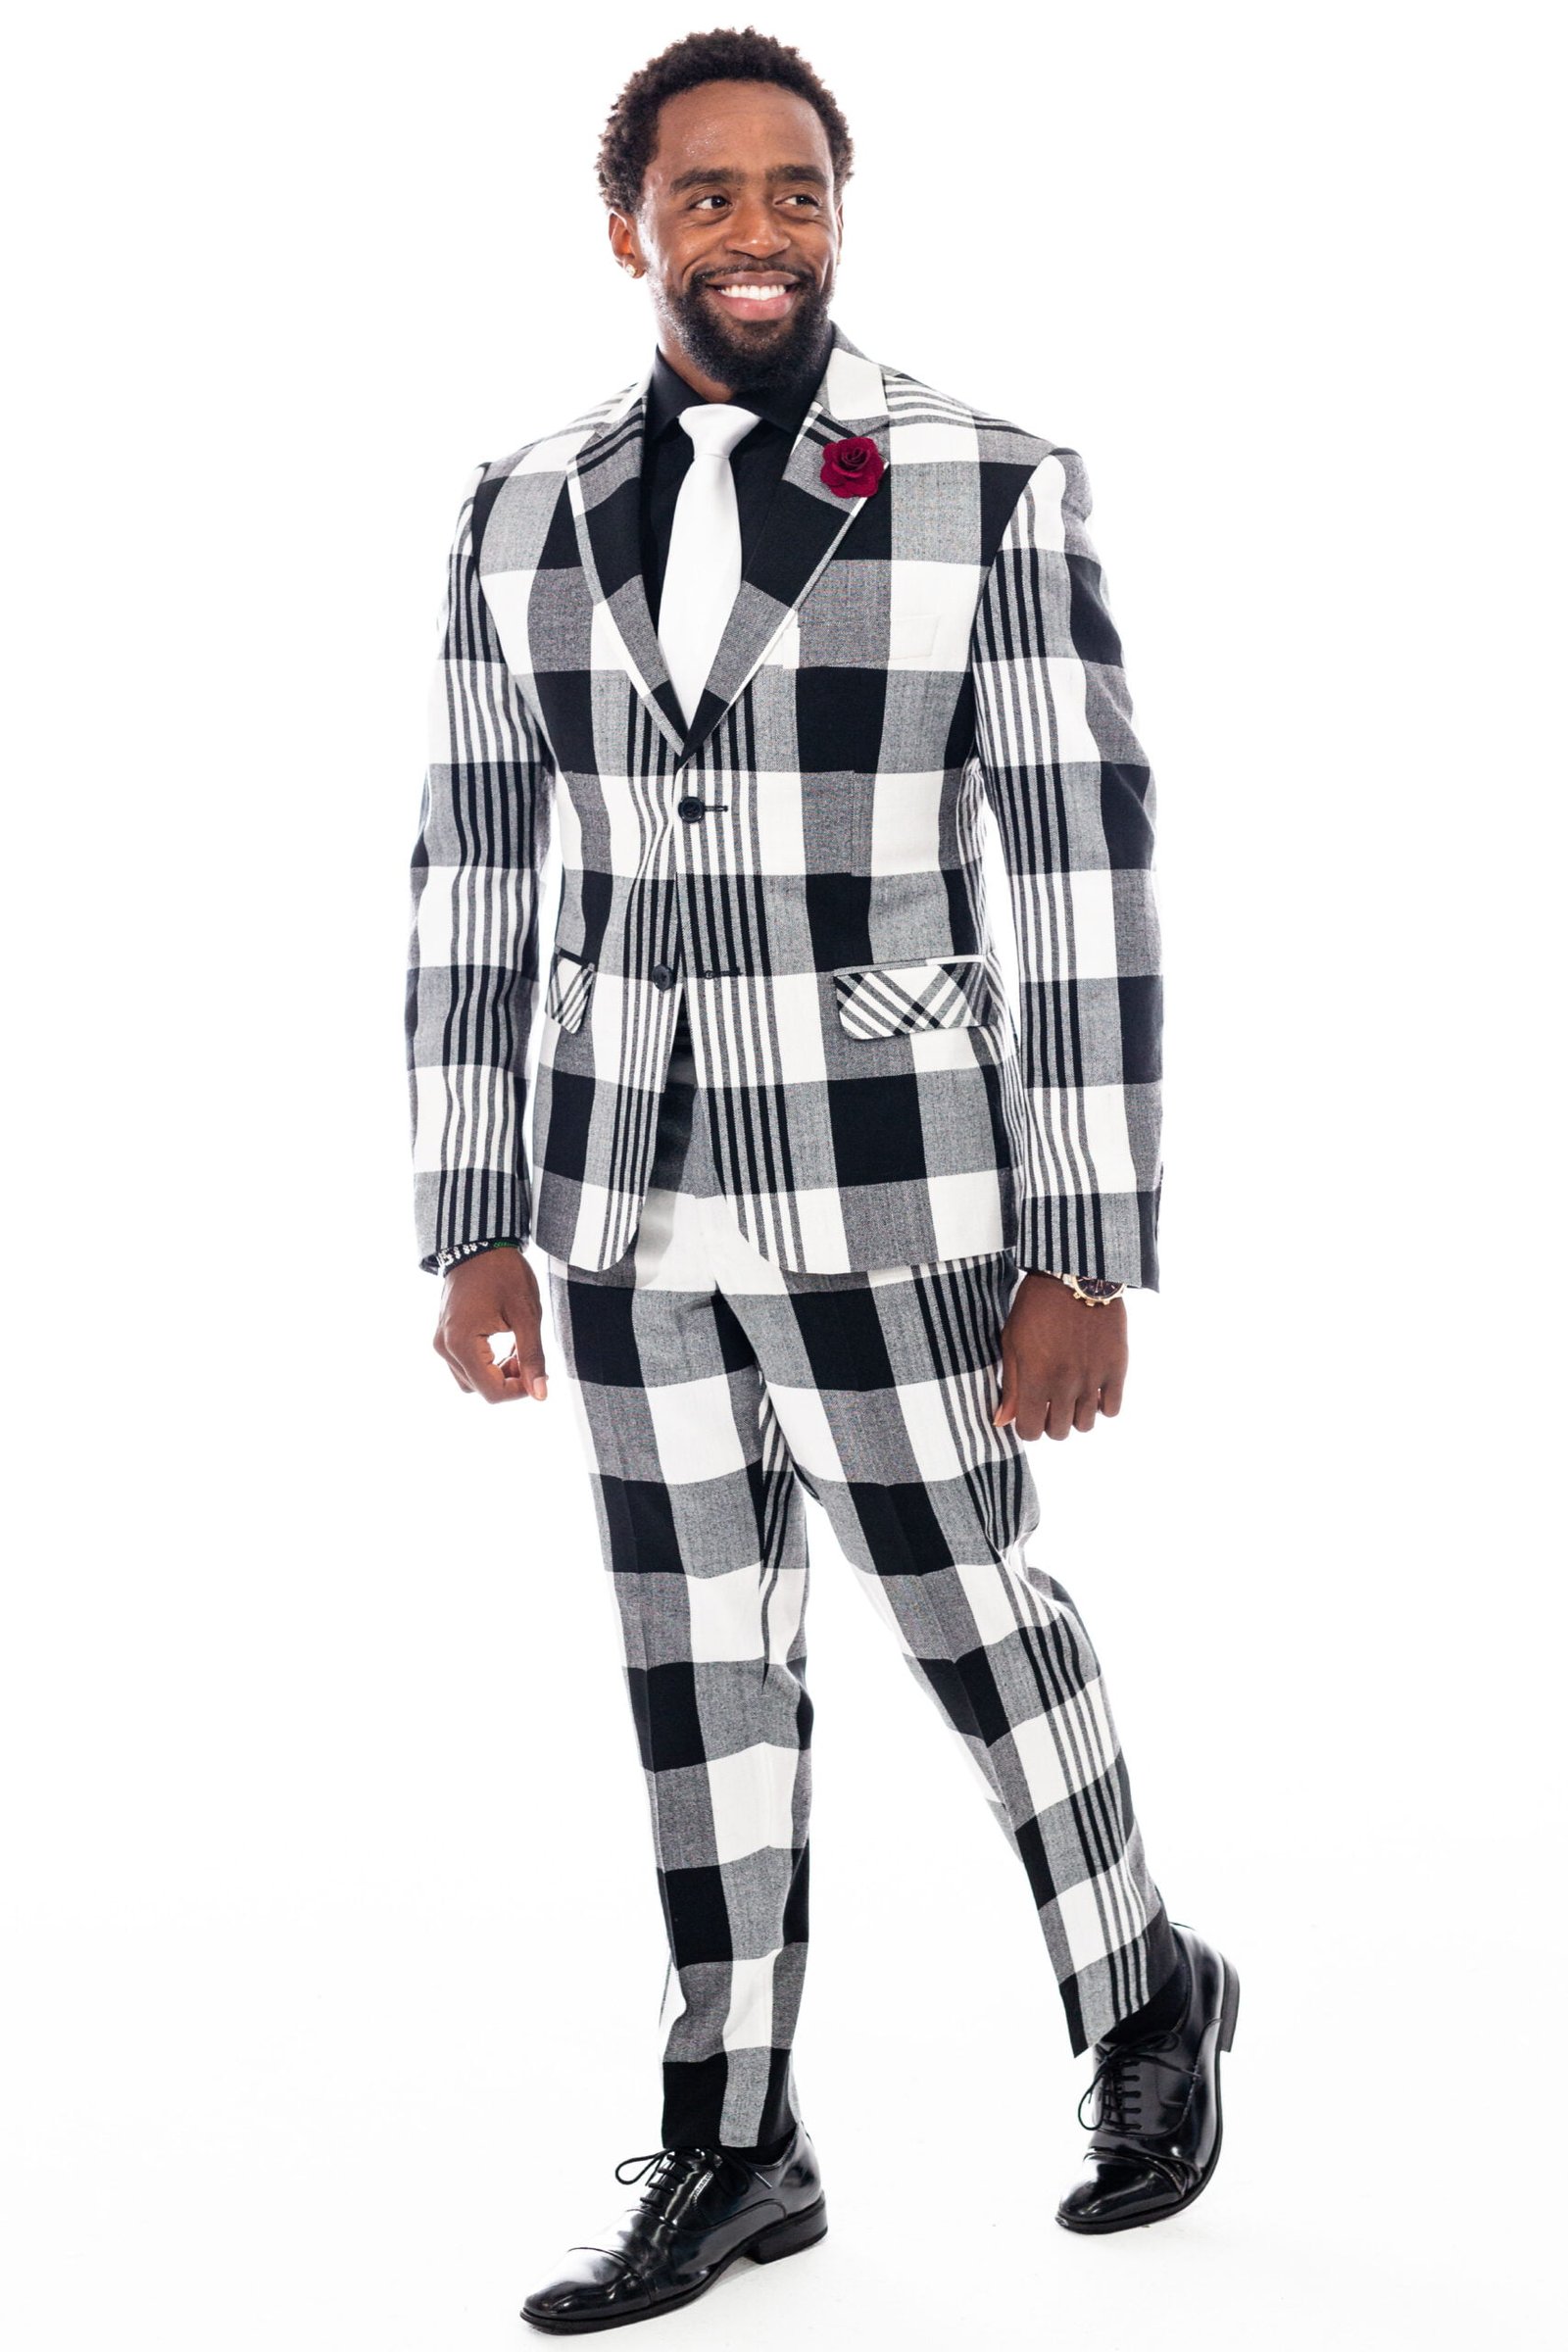
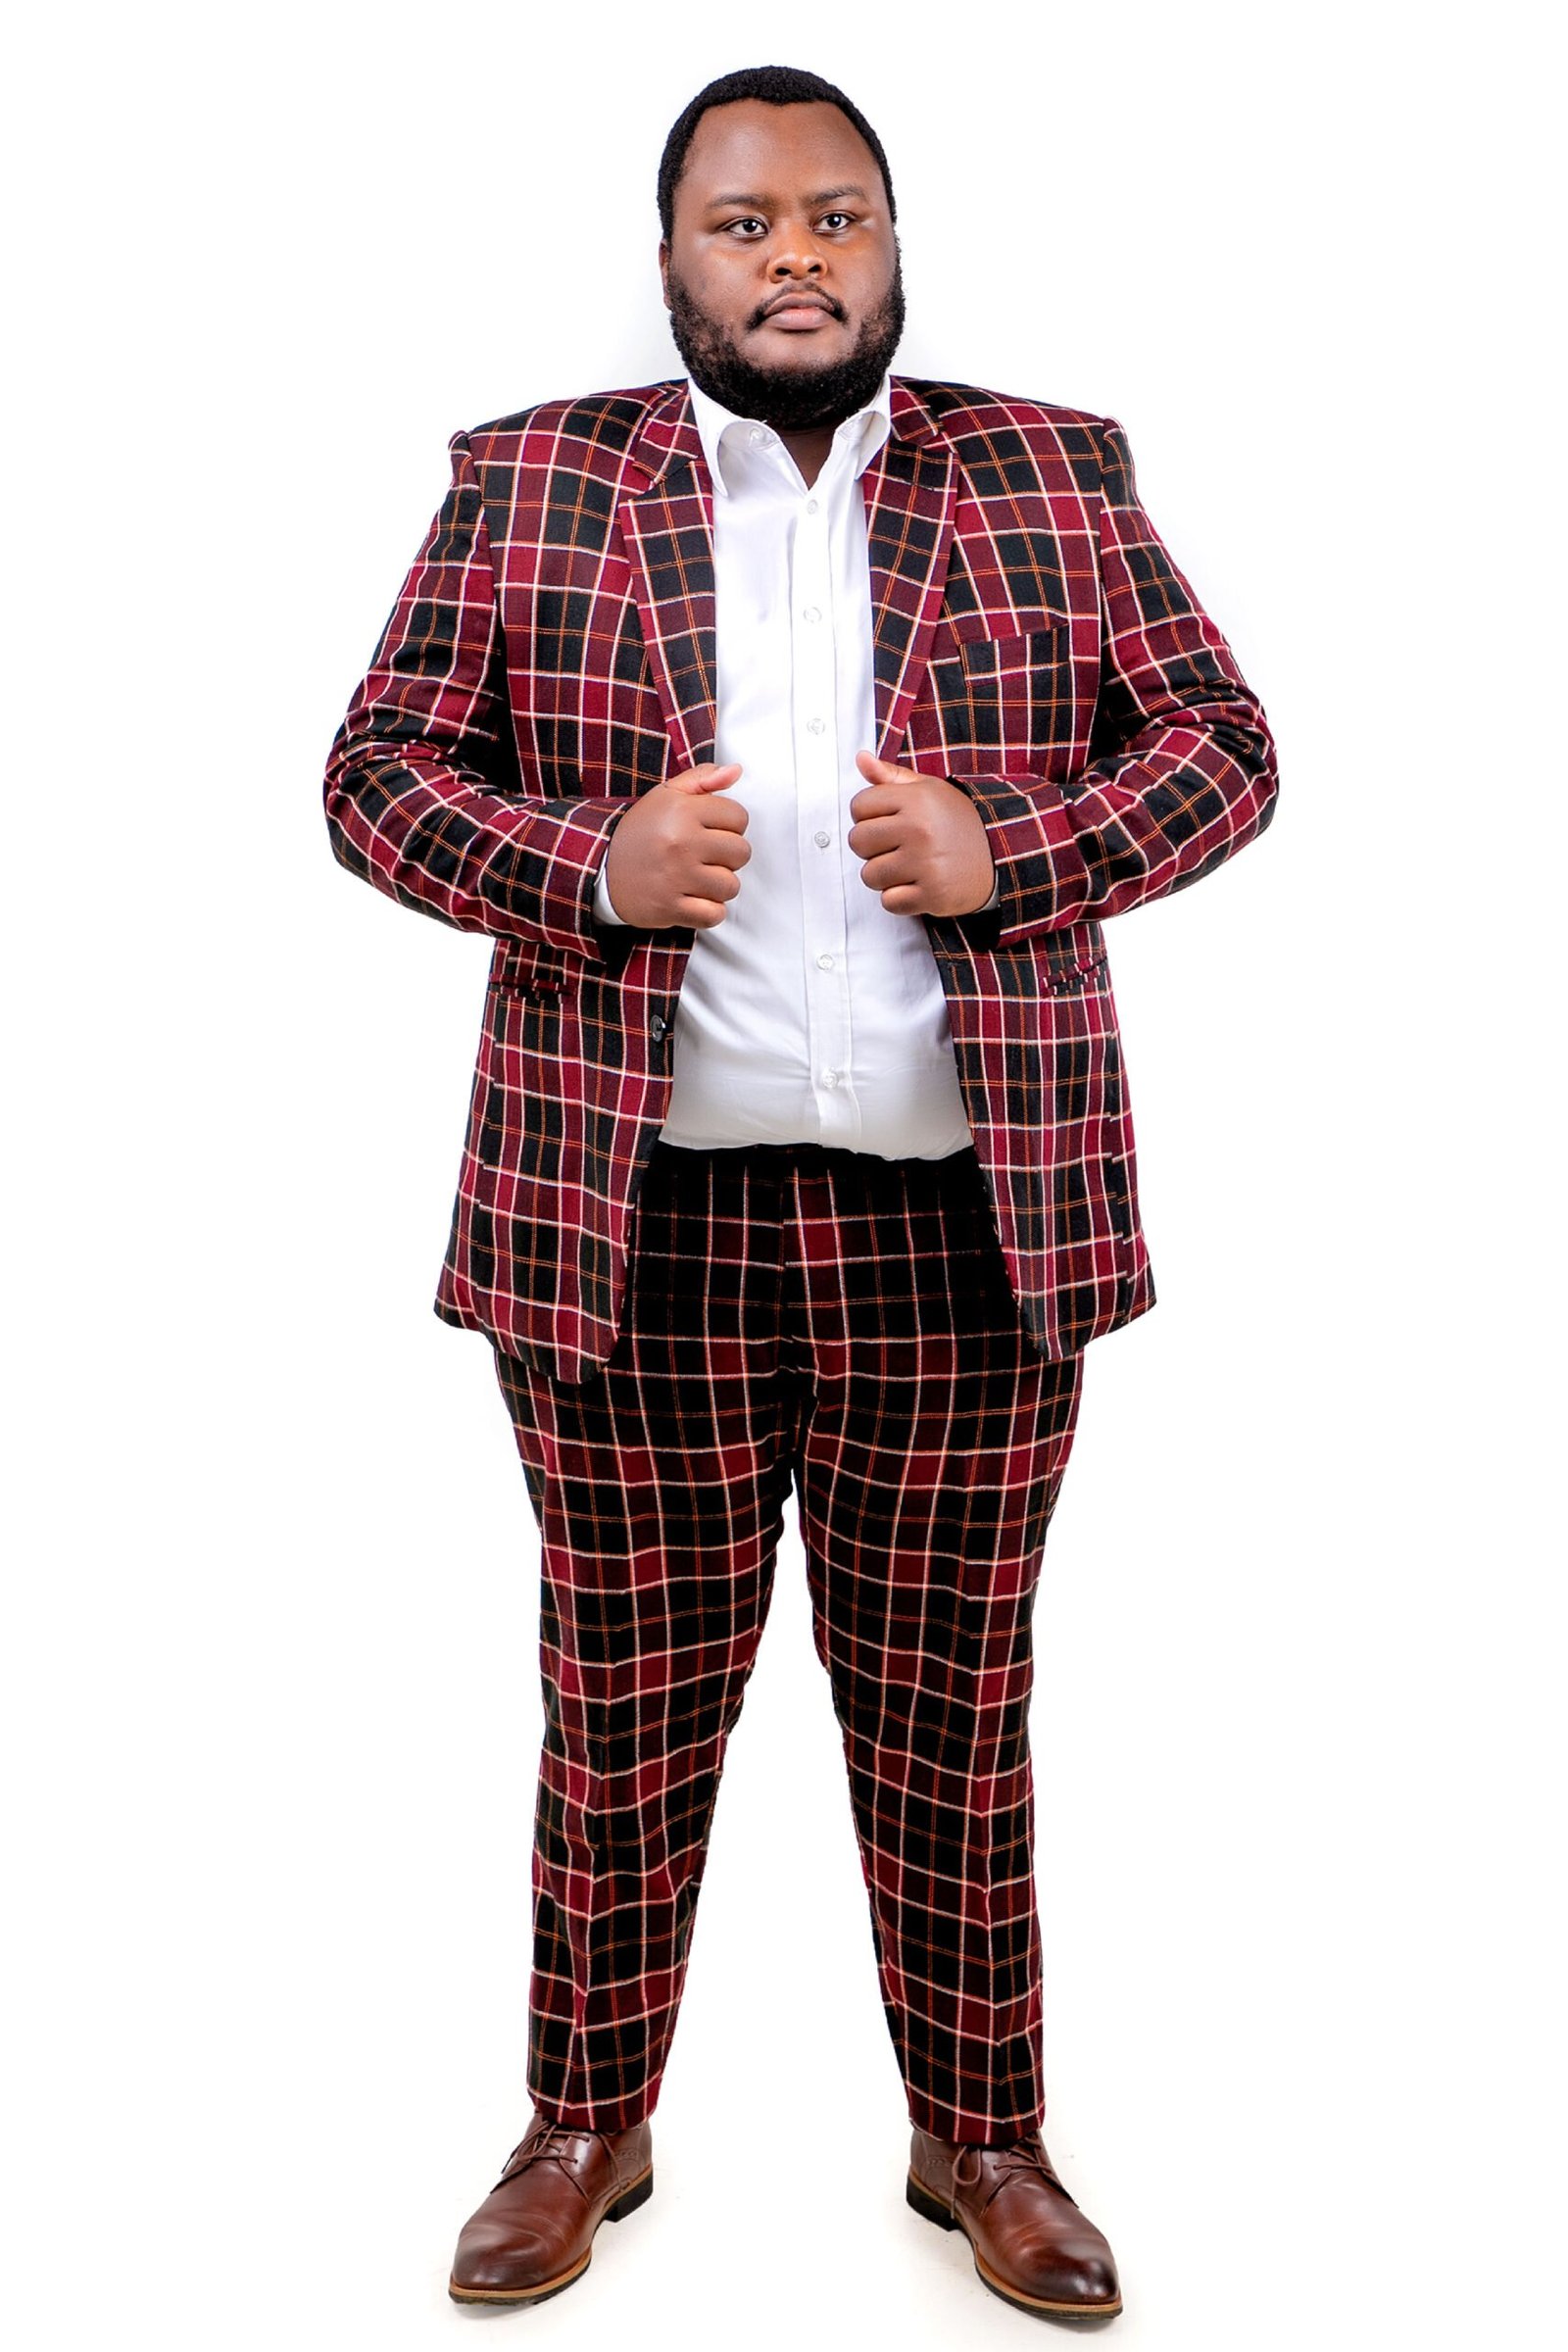
fbpx

Men's African Prints

Kikoy Prints

Embu Print
4 Products
Korongo Print
4 Products
Malindi Print
4 Products
Mbuni Print
4 Products
Nyani Print
4 Products
Thika Print
3 Products
Paka Print
0 Products

Kitenge Prints

Buna Print
4 Products
Duma Print
4 Products
Fisi Print
4 Products
Kenge Print
4 Products
Kifaru Print
4 Products
Kilifi Print
4 Products
Kima Print
4 Products
Kitale Print
4 Products
Mamba Print
4 Products
Nakuru Print
4 Products
Samba Print
4 Products
Samburu Print
4 Products
Siaya Print
4 Products

Maasai Prints

Amboseli Print
4 Products
Chui Print
4 Products
Kuro Print
4 Products
Mara Print
4 Products
Meru Print
4 Products
Ndovu Print
4 Products
Punda Print
4 Products
Swala Print
4 Products
Tala Print
4 Products
Tembo Print
0 Products
Simba Print
0 Products

Rasmi Prints

Wakanda
2 Products

How to Measure

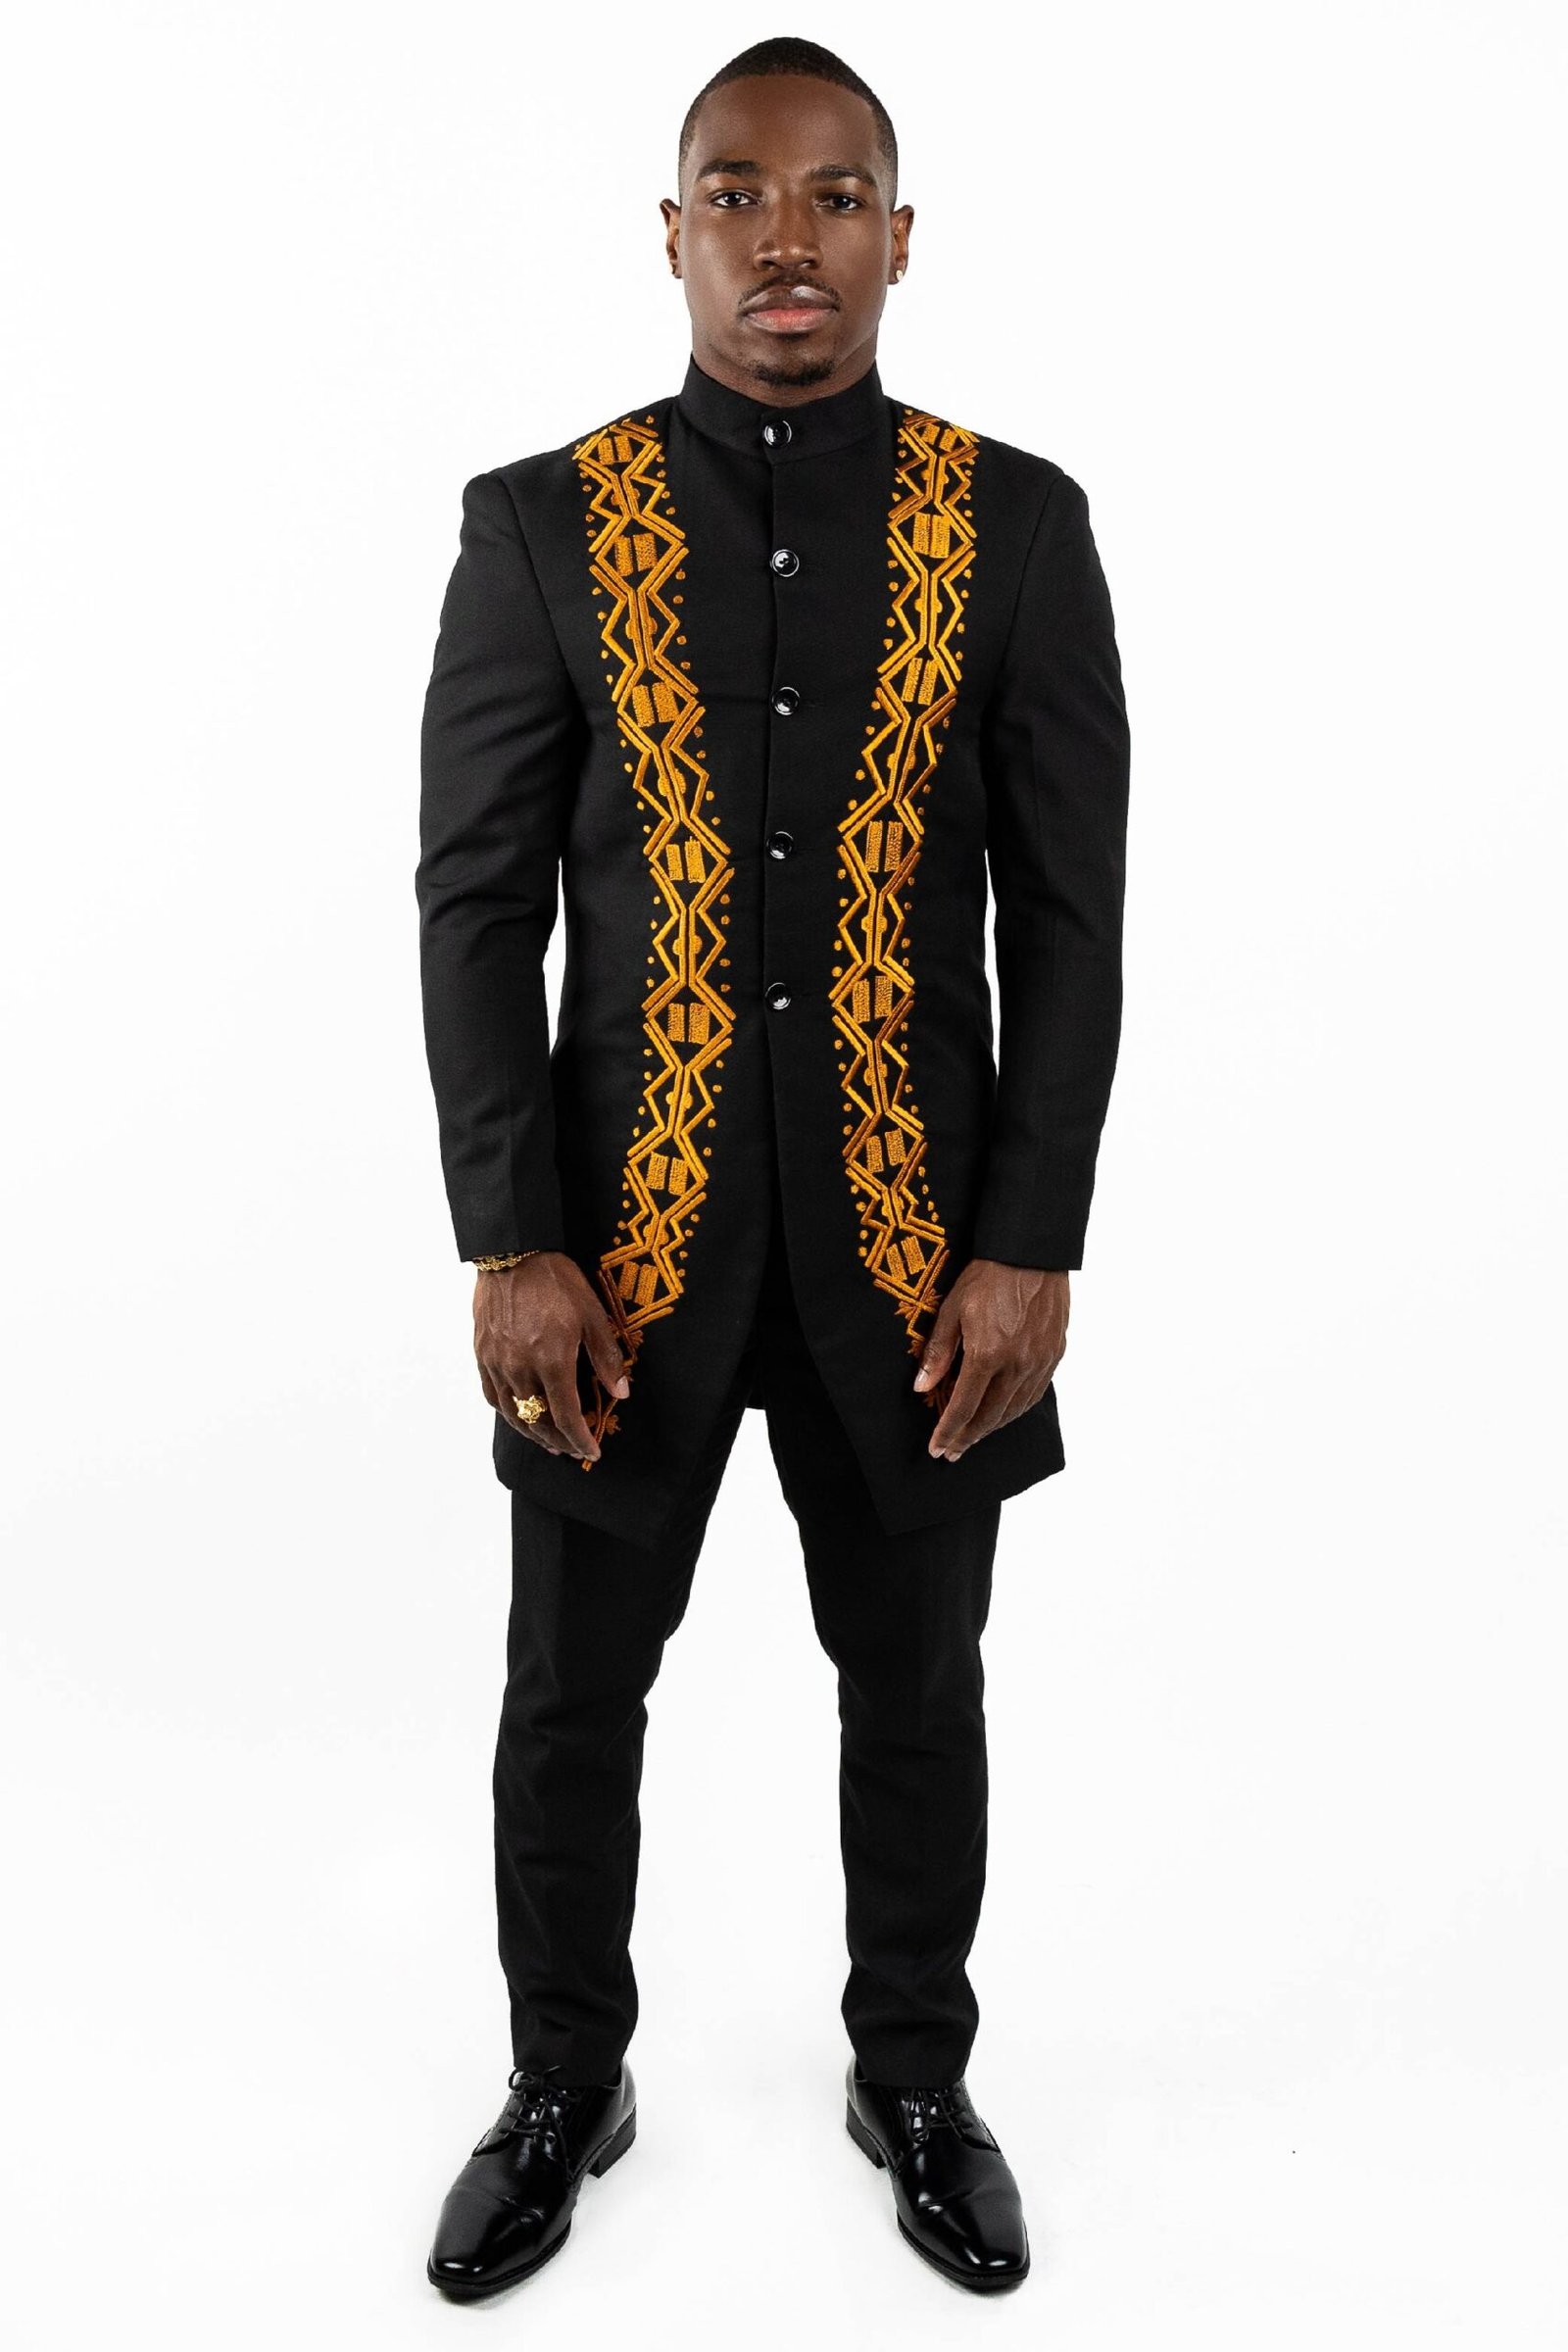
Style is only one element of the perfect suit. The other critical element is fit. With suits, you elevate your game from ordinary to extraordinary when you get a suit that compliments every aspect of your body. That distinction shows the world that the suit you acquired was made especially for you, and no one else. That’s where we come in — Our goal is to serve YOU specifically and make sure your needs are met. To that end, as part of our ordering process, we ask that you provide the measurements outlined below after purchasing your garment.

For the best results, we advise that you get your measurements from a tailor. If you do not have access to a tailor, please follow the written instructions and videos to self-measure. Many of our clients self-measure and get great results!! If you’re ever in doubt about certain measurements, always air on the side of adding rather than subtracting to allow for alterations.

For best results, do your self measurements with a fitted dress shirt and fitted dress pants.
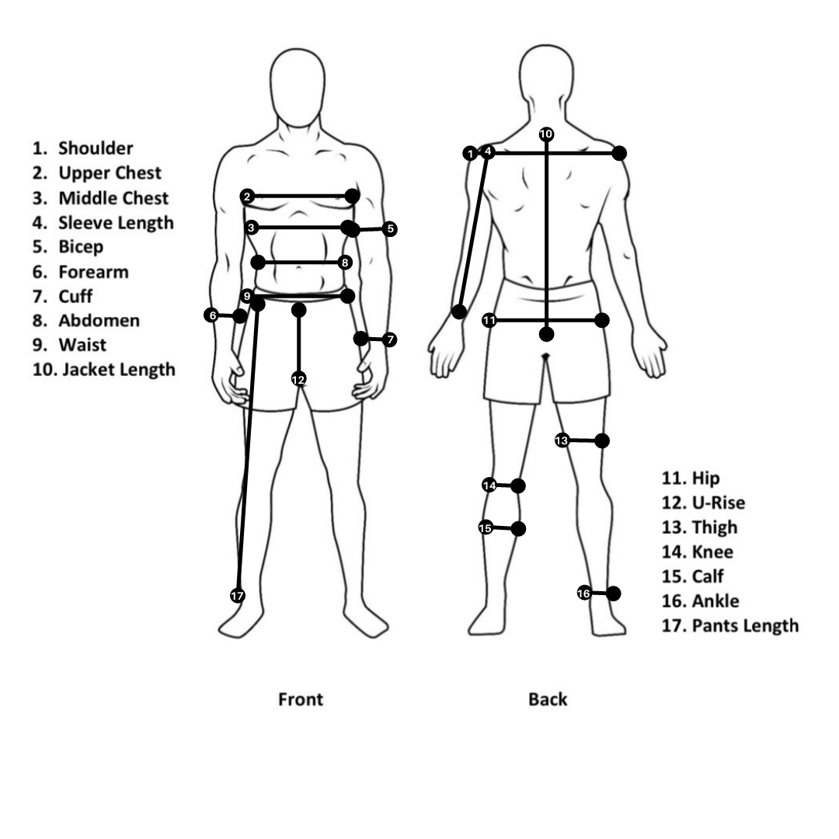
 

BLAZER

 
  • Upper Chest
    Raise both arms and run the tape measure around the top part of your torso (closer to your front deltoid). Go all the way around your body until the tape measure connects. At the point of contact, ensure there is a little bit of breathing room (about an inch), and that’s the measurement of your upper chest. This measurement should yield a smaller number than middle chest.
 
  • Middle Chest
    Raise both arms and run the tape measure around the fullest part of your chest, underneath both your arms. Go all the way around your body until the tape measure connects. At the point of contact, ensure there is a little bit of breathing room (about an inch), and that’s the measurement of your middle chest.
 
  • Shoulders (measured from behind)
    Start your tape measure at the joint of one shoulder. Then, run it across the top of your shoulders, behind your neck, and to the joint of your other shoulder.
 
  • Sleeve Length
    Place the end of your tape measure on your shoulder deltoid. Slide the tape measure down your arm toward your wrist. Take the measurement at your wrist to find your proper sleeve length.
 
  • Sleeve Bicep
    Put your hands by your side, relaxed. Start the tape measure at the top of your bicep muscle and take the tape measure around the bicep until the tape measure connects.
 
  • Forearm
    Put your hands by your side, relaxed. Start the tape measure at the front of your forearm and take the tape measure around the biceps until the tape measure connects.
 
  • Cuff
    Start the tape measure at the bone of your wrist and go around the entire wrist until the tape measure connects. Leave about an inch breathing room here as well, as in the video. For more accurate results, measure with a long-sleeved shirt on.
 
  • Abdomen
    Run the tape measure around the stomach area. Go all the way around your body until the tape measure connects. At the point of contact, ensure there is a little bit of breathing room (about an inch), and that’s the measurement of your abdomen.
 
  • Blazer Length
    Start the tape measure from the back of the base of your neck. Run the tape measure straight down until just a little below your buttocks. If you prefer a longer blazer length, you have the freedom to extend the tape measure a little further down, and that’s the blazer length
PANTS
 
  • Waist

    Position the tape measure where you normally wear a belt. Then, wrap the tape measure around your waist, and where the tape connects is your waist measurement. Choose how much breathing room you want for your pants.

 
  • Hip
    At the strongest part of the buttocks, measure the circumference around your body. Where the tape connects is your hip measurement.


  • Crotch/U-Rise
    Position your tape measure at the buckle of your belt (or where that would be without a belt. Bring the tape measure down and behind your crotch to the corresponding belt position on the back of your pants/body. Make note of the measurement — that is the U-rise.


  • Thigh
    Measure the circumference of your thigh by taking the tape measure around the middle of your thigh until the tape measure connects. That’s your thigh measurement.


  • Knee
    Measure the circumference of
    your knee by taking the tape measure around the middle of your knee until the tape measure connects.


  • Calf
    Measure the circumference of your calf by taking the tape measure around the largest part of your calf until the tape measure connects. 


  • Ankle
    Measure the circumference of your ankle by taking the tape measure around the ankle until the tape measure connects. Leave a little breathing room for the pants (about an inch).


  • Pants
    Length/Outdraw (measure with shoes on)

    To take this measurement, position your tape at the top of your waistband at your side. Then, slide the measuring tape down to the point where your pants hit your shoes. There are variety of pants breaks that you can choose from, including above the ankle, right at the top of your shoe, a little past the top part of your shoe. This is really up to you and what your personal preference is. We recommend either above the ankle or right at the top of your shoe for the most modern look.

How to Measure

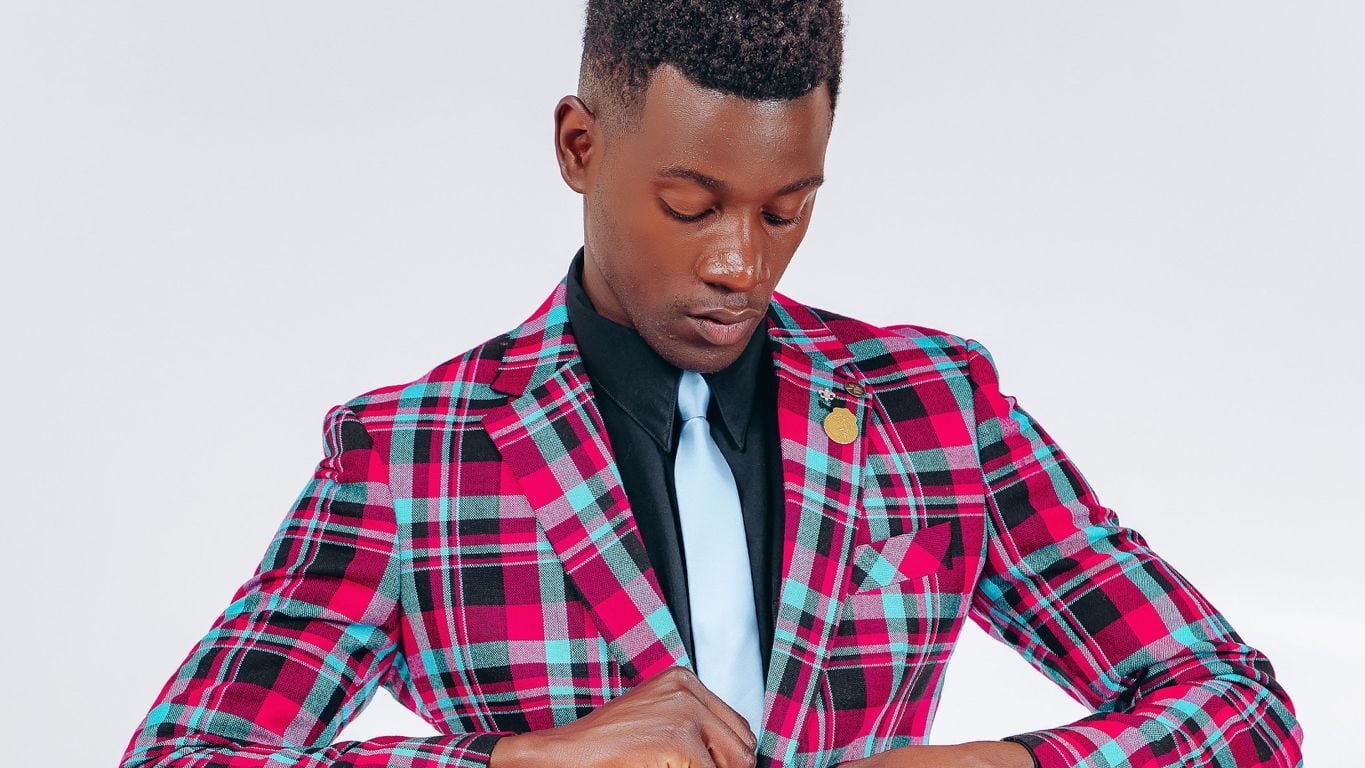
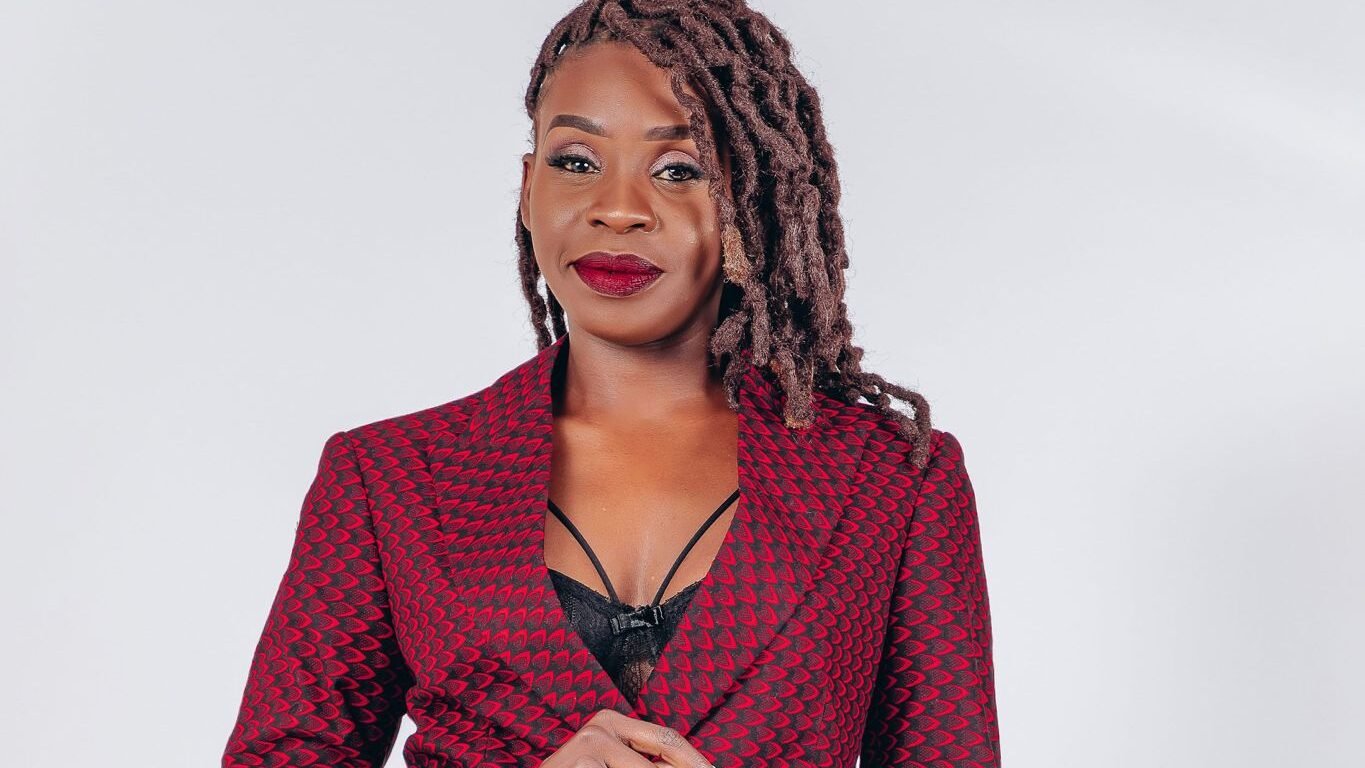
Style and fit go hand in hand to make the perfect outfit -- be it a pants suit, skirt suit, or a blazer dress. So few brands out there cater to every woman. At the Wakilisha Collection, we promise to cater to all your needs and get you the perfect African print garment for You. Here, you don't have to worry about your body type, your figure, your bust size -- WE GOT YOU! As part of our ordering process, we ask that you provide the measurements outlined below after purchasing your garment.

For the best results, we advise that you get your measurements from a tailor. If you do not have access to a tailor, please follow the written instructions and videos to self-measure. Many of our clients self-measure and get great results!! If you’re ever in doubt about certain measurements, always air on the side of adding rather than subtracting to allow for alterations.

4
  • Bust
    Raise botH arms and run the tape measure around the fullest part of your chest, underneath both your arms. Go all the way around your body until the tape measure connects. At the point of contact, ensure there is a little bit of breathing room (about an inch), and that’s the measurement of your Bust. See video for guidance.

  • Upper Bust
    Measure above the bust following the same instructions as the bust. See the video for guidance.

  • Side Neck to Bust Apex
    Measure from the base of the neck at the shoulder seam to the apex on the bust on the same side of the body.

  • Shoulder
    Start your tape measure at the joint of one shoulder. Then, run it across the top of your shoulders, behind your neck, and to the joint of your other shoulder.

  • Neck to Shoulder
    Run the tape measure from the base of the neck to the end of your shoulder deltoid.

  • Bodice (Shoulder to Waistline)
    On the side of the body, run the tape measure from the top of the shoulder down to the natural waistline. Record the measurement.

  • Underbust to Waistline
    Run the tape measure from underneath the bust to the natural waistline. The recorded measurement is the underbust to the waistline.

  • Underbust to crotch
    Run the tape measure from underneath the bust to the crotch area. Record that measurement, as seen in the video.

  • Sleeve length
    Place the end of your tape measure on your shoulder deltoid. Slide the tape measure down your arm toward your wrist. Take the measurement at your wrist to find your proper sleeve length.

  • Sleeve bicep
    Put your hands by your side, relaxed. Start the tape measure at the top of your bicep muscle and take the tape measure around the bicep until the tape measure connects.

  • Forearm
    Put your hands by your side, relaxed. Start the tape measure at the front of your forearm and take the tape measure around the biceps until the tape measure connects.

  • Cuff
    Start the tape measure at the bone of your wrist and go around the entire wrist until the tape measure connects. Leave about an inch breathing room here as well, as in the video. For more accurate results, measure with a long-sleeved shirt on.

  • Blazer Length
    Start the tape measure from the back of the base of your neck. Run the tape measure straight down until just a little below your buttocks. If you prefer a shorter blazer length, you have the freedom to reduce the length of the tape measure.
  • Blazer Dress Length
    Start the tape measure from the back of the base of your neck. Run the tape measure straight down until just a little above the back of your knees. If you prefer a longer blazer length, you have the freedom to extend the tape measure a little further down, and if you prefer shorter, you can stop the tape measure a little higher up.


  • Waist (including High/Low)
    Position the tape measure where you normally wear a belt. Then, wrap the tape measure around your waist, and where the tape connects is your waist measurement. Choose how much breathing room you want for your pants.


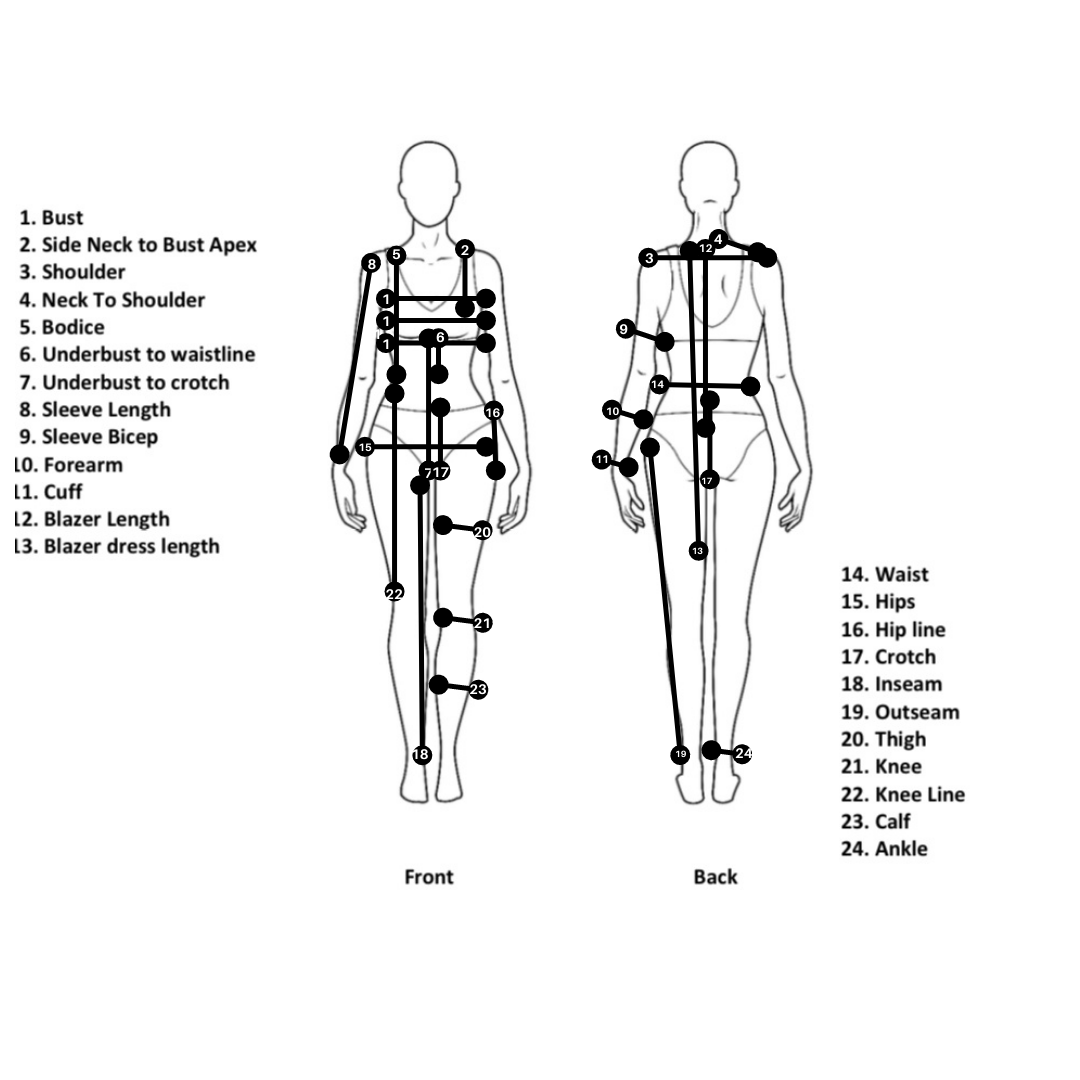
    NB: If you would like high waisted pants or low waisted pants, you can run the tape measure from around the belly button area for high waisted pants or just above the hips for low waisted.

  • Hips
    At the strongest part of the buttocks, measure the circumference around your body. Where the tape connects is your hip measurement.

  • Hip line
    Run the tape measure from the waist to the fullest part of the hips.

  • Crotch (high crotch/low crotch)
    Position your tape measure either your high waist or low waist.. Bring the tape measure down and behind your crotch to the corresponding position on the back of your pants/body. Make note of the measurement — that is the desired crotch measurement.

  • Inseam (measure with shoes on)
    Measure from the inside of the crotch at the top of the thigh down the leg to where your pants hit your shoes.

  • Outseam (high waisted/low waist)
    Wear shoes for this measurement. To take this measurement, position your tape at the top of your waistband (high or low) at your side. Slide the measuring tape down to the point where your pants hit your shoes.

  • Thigh
    Measure the circumference of your thigh by taking the tape measure around the middle of your thigh until the tape measure connects. If you have thicker thighs, you can also measure diagonally to the thickest part of the thigh (as in video) in order to ensure the right fit.

  • Knee
    Measure the circumference of your knee by taking the tape measure around the middle of your knee until the tape measure connects.

  • Knee line
    Run the tape measure from your waistline to the knee cap.

  • Calf
    Measure the circumference of your calf by taking the tape measure around the largest part of your calf until the tape measure connects.

  • Ankle
    Measure the circumference of your ankle by taking the tape measure around the ankle until the tape measure connects. Leave a little breathing room for the pants (about an inch).


Shopping cart close